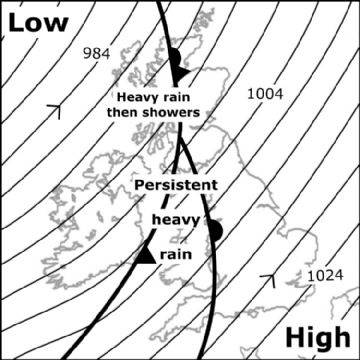
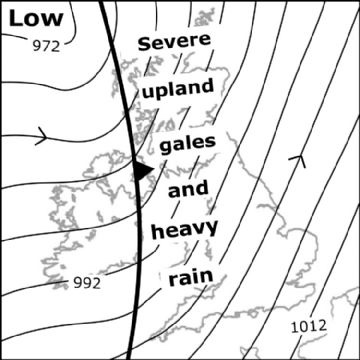
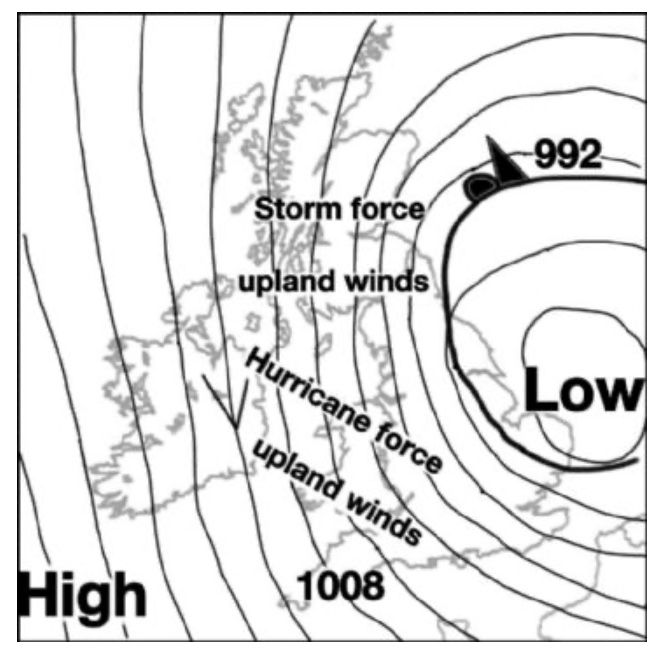
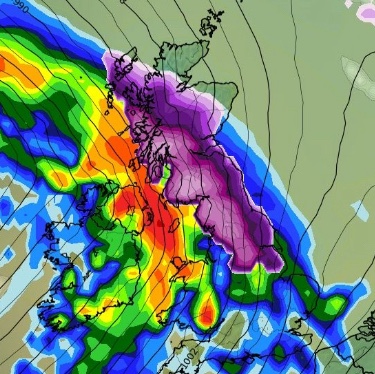
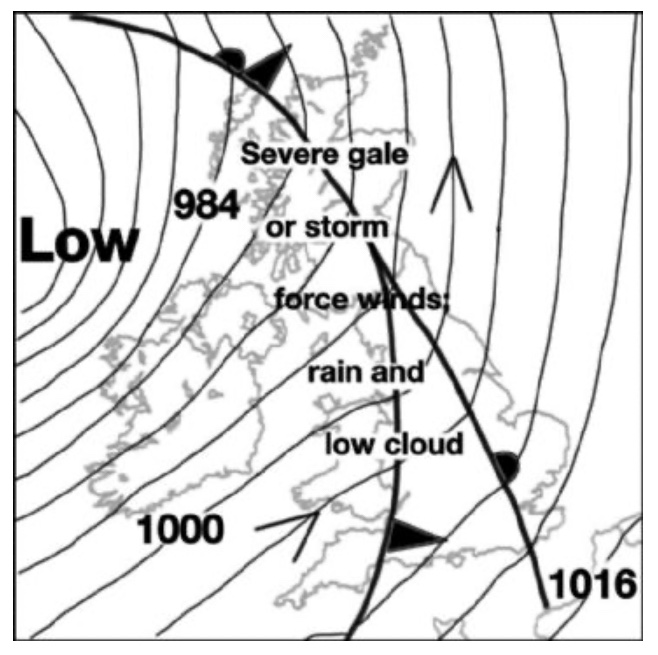
After a spell of good weather, also known as the “Spring of Deception” – the bad weather is back…
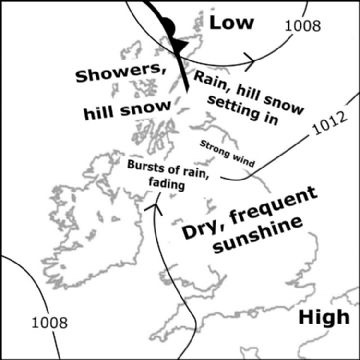
I’m supposed to be instructing in that lot tomorrow…
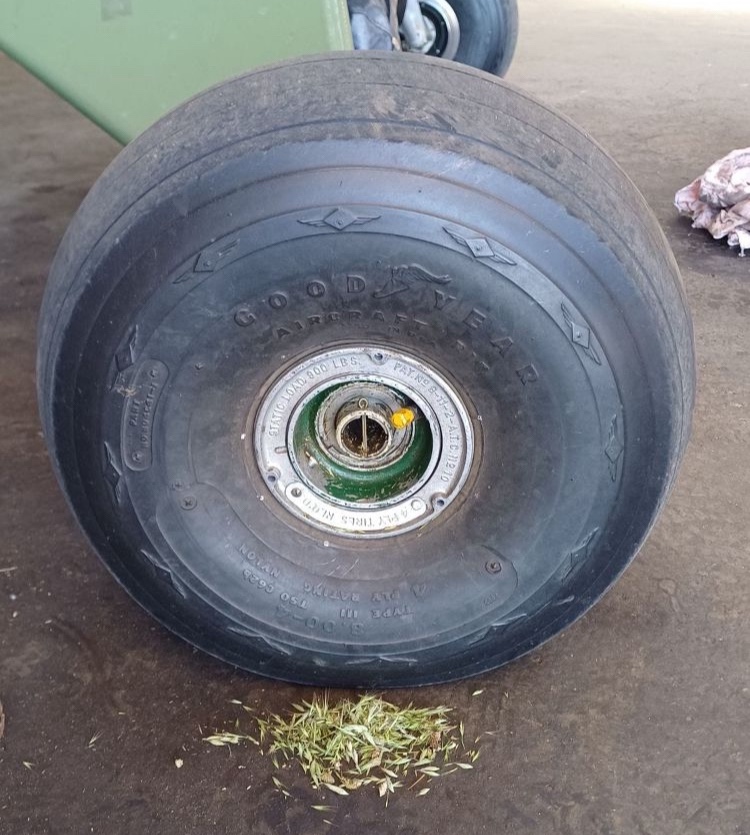
Looking forward to hotter days and grass stuck under hubcaps:
Adventures with aircraft, and other random stuff…
After a spell of good weather, also known as the “Spring of Deception” – the bad weather is back…
I’m supposed to be instructing in that lot tomorrow…
Looking forward to hotter days and grass stuck under hubcaps:
Some people say that we are coming into the start of the flying season. They should have told the weather man…
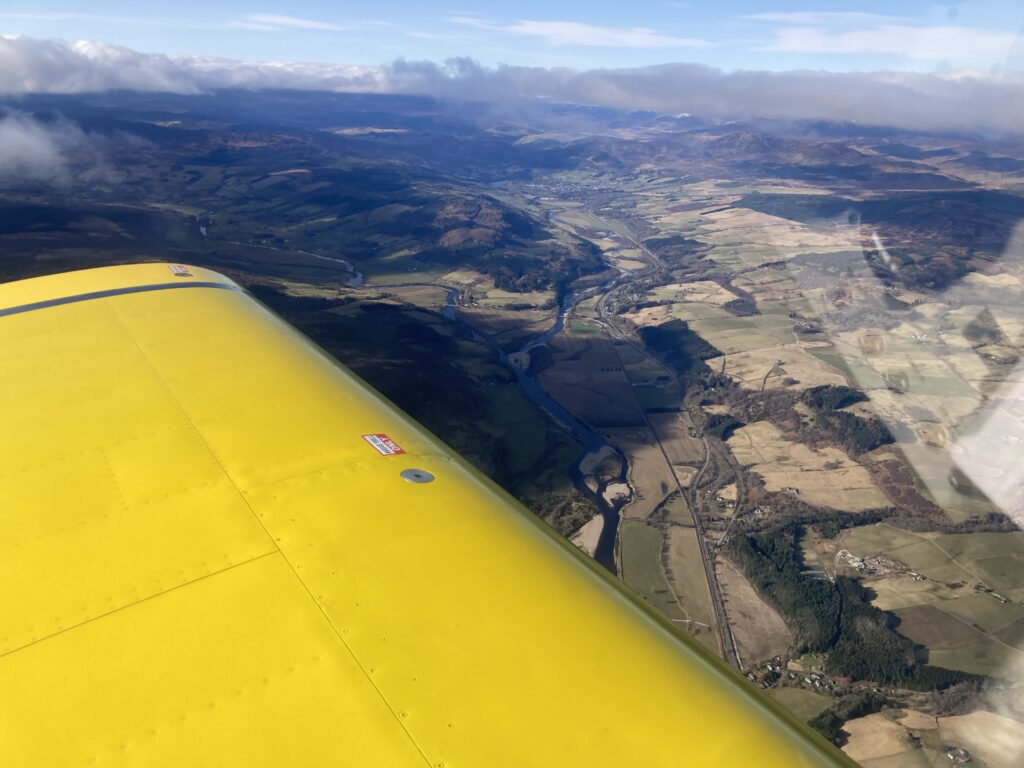
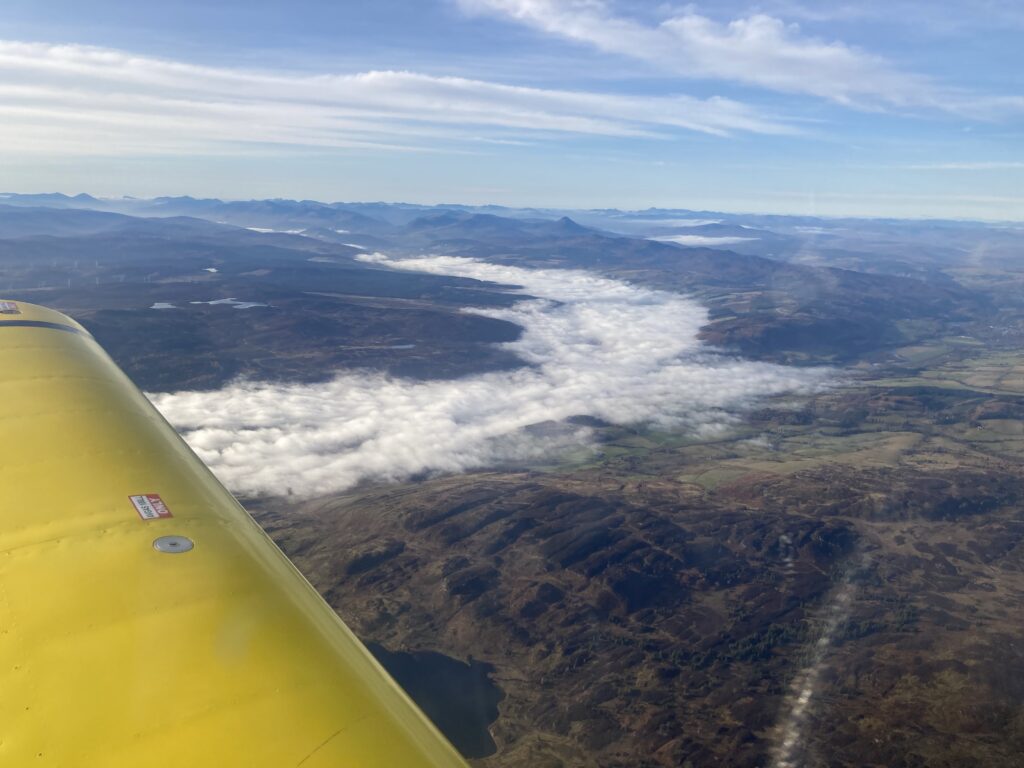
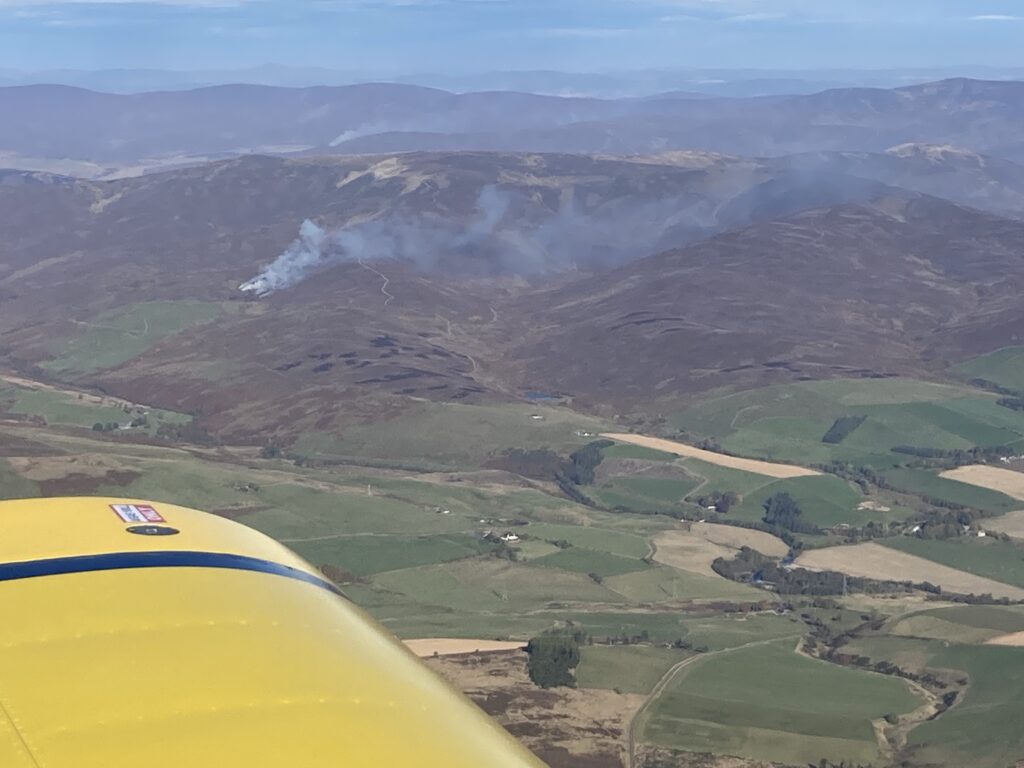
It hasn’t been 100% doom and gloom, there have been some nice days:

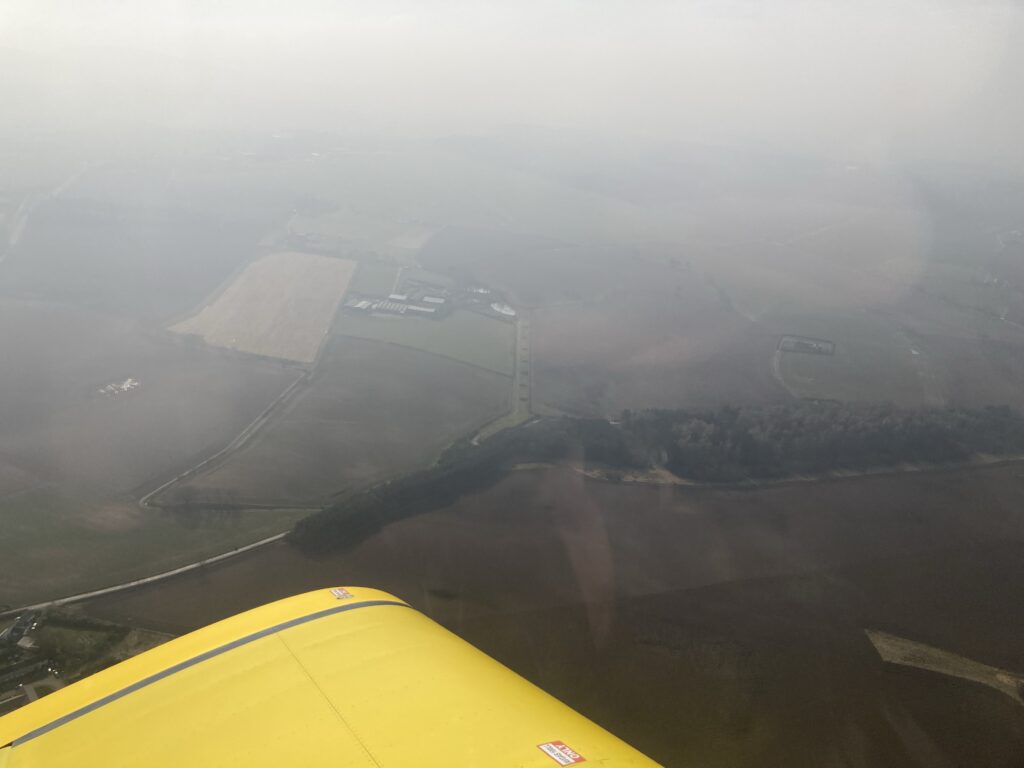
Looking north up the A9 road towards Pitlochry…
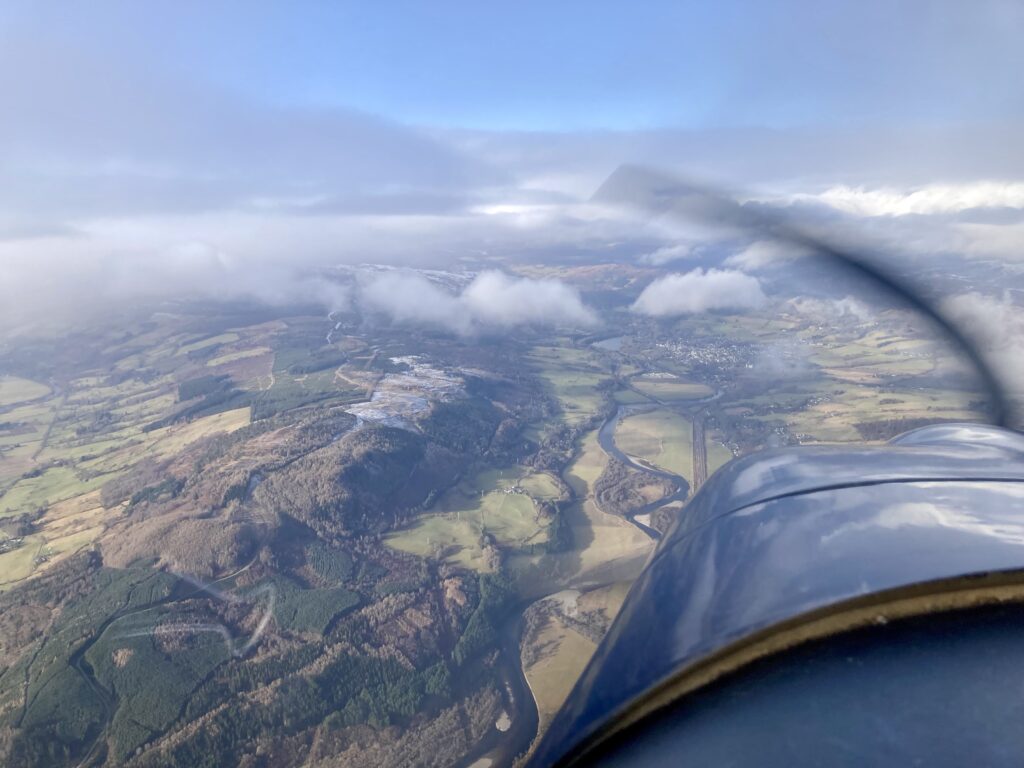
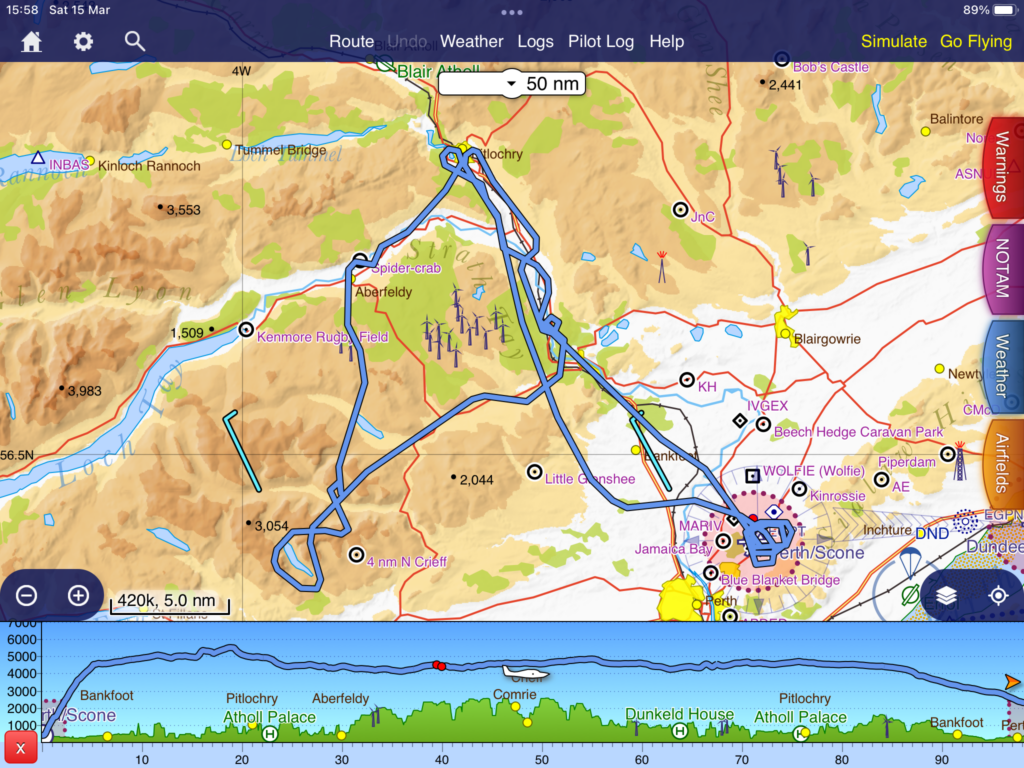
A little bit of low cloud caused a reroute. Not that there WAS a route as such, just a bimble around the countryside. Also known as FACIT – F*** About, Call It Training…
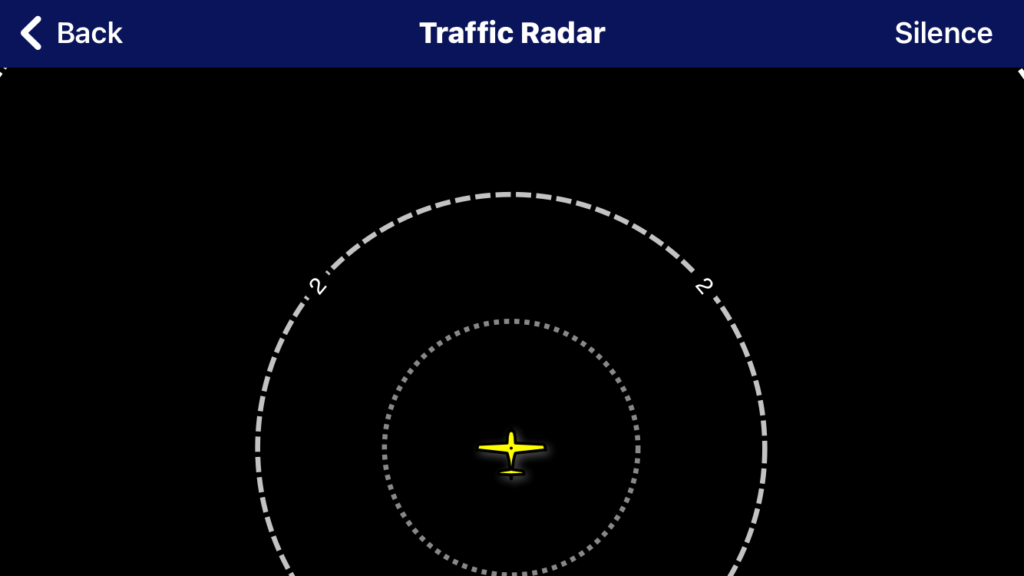
Nobody about on the traffic radar:
We spotted smoke on the hills and wandered over to have a look:
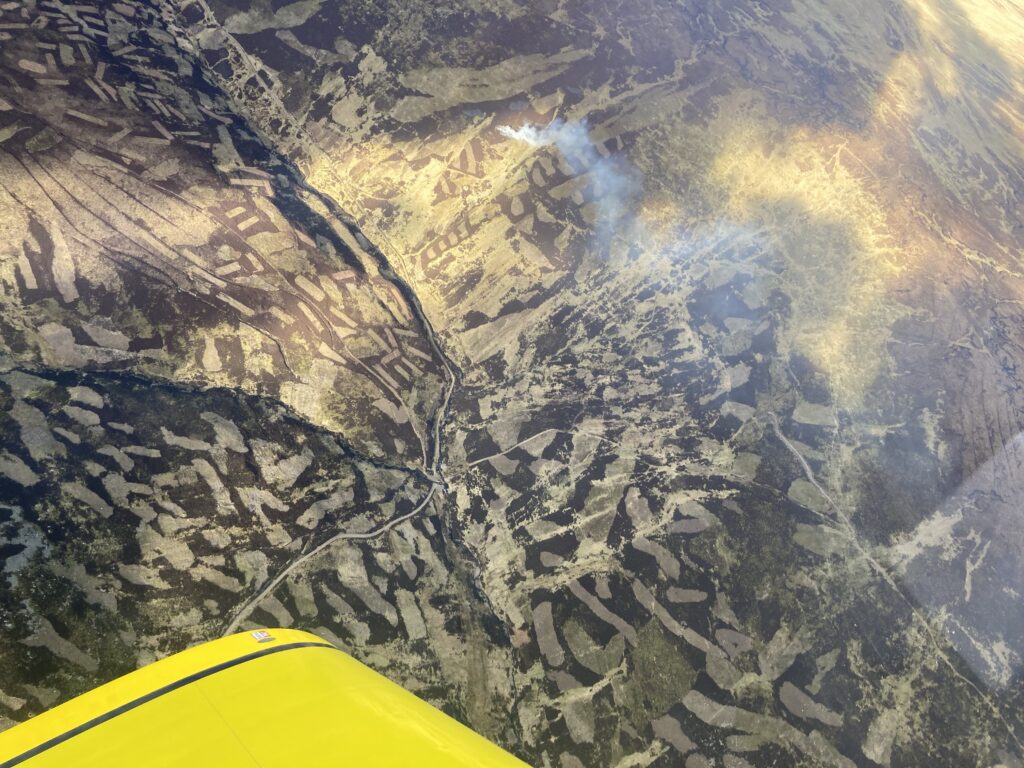
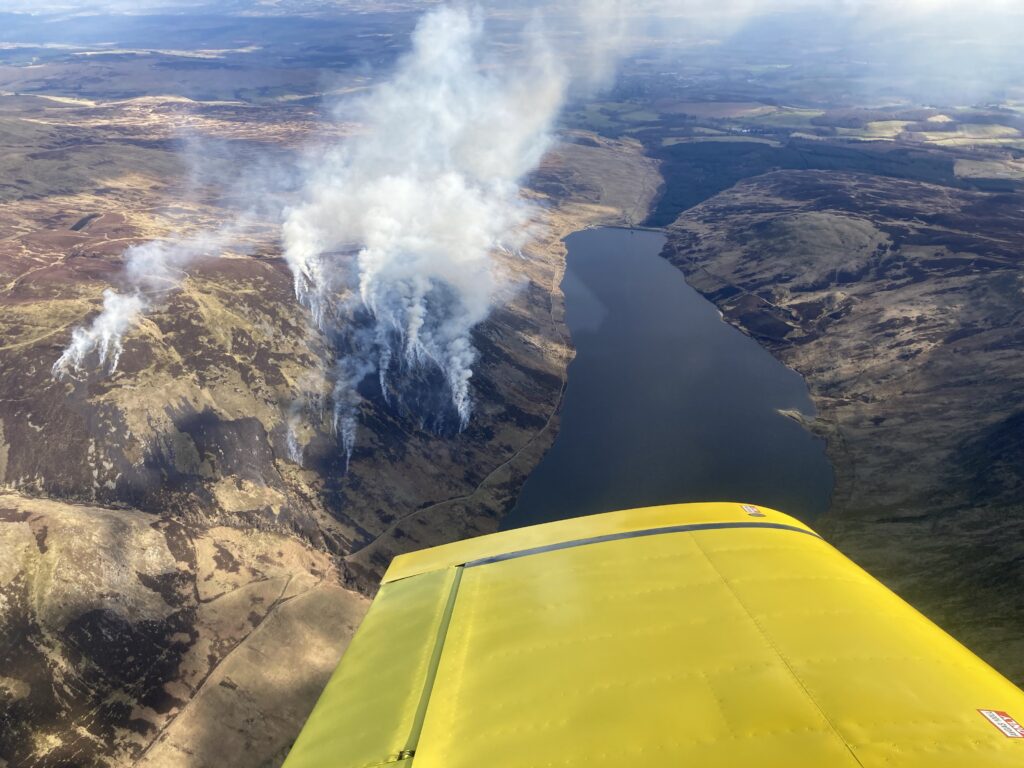
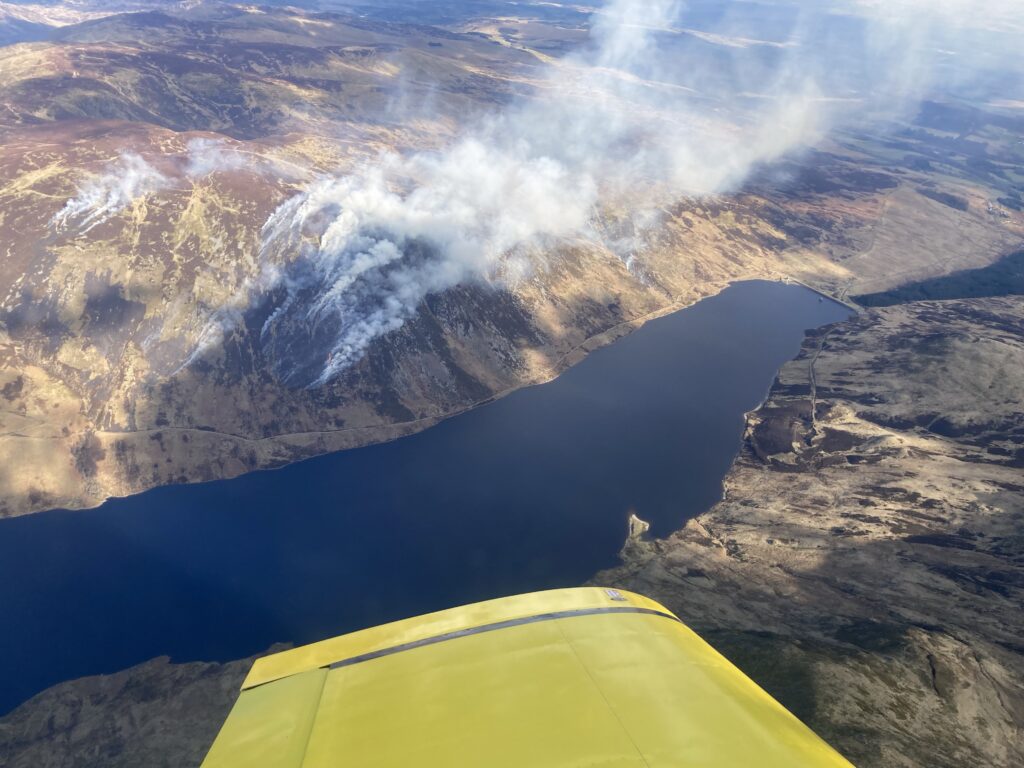

If we’d been in the Cub we could have flown around pretending to call in artillery fire, like 2nd Lieutenant Walter Mitty.
The Cub is still grounded. I went to visit the engineer who is doing the repair and it looks like it’ll be complete late summer.
But in slightly better news, it will probably be a splice repair, not a whole spar.
In the meantime we can still wander round the countryside like this
A few days after the previous flight, it was so gloomy that this was the view of the airfield from the downwind leg:
We landed off that circuit!
Aaaand…normal service is resumed!
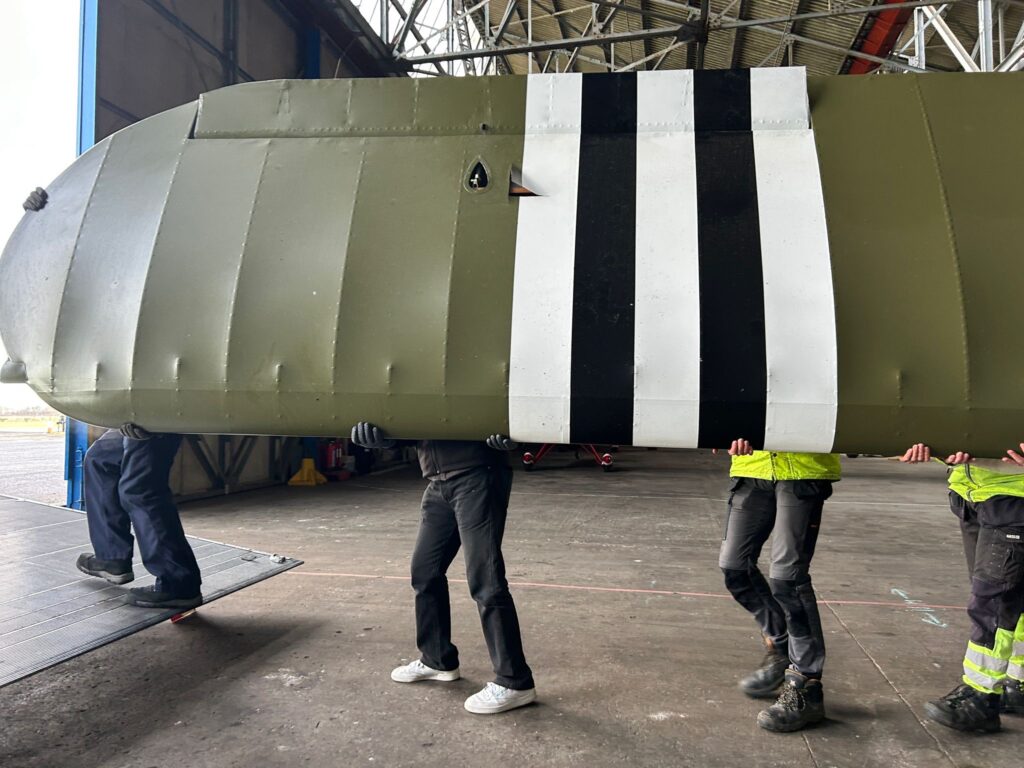
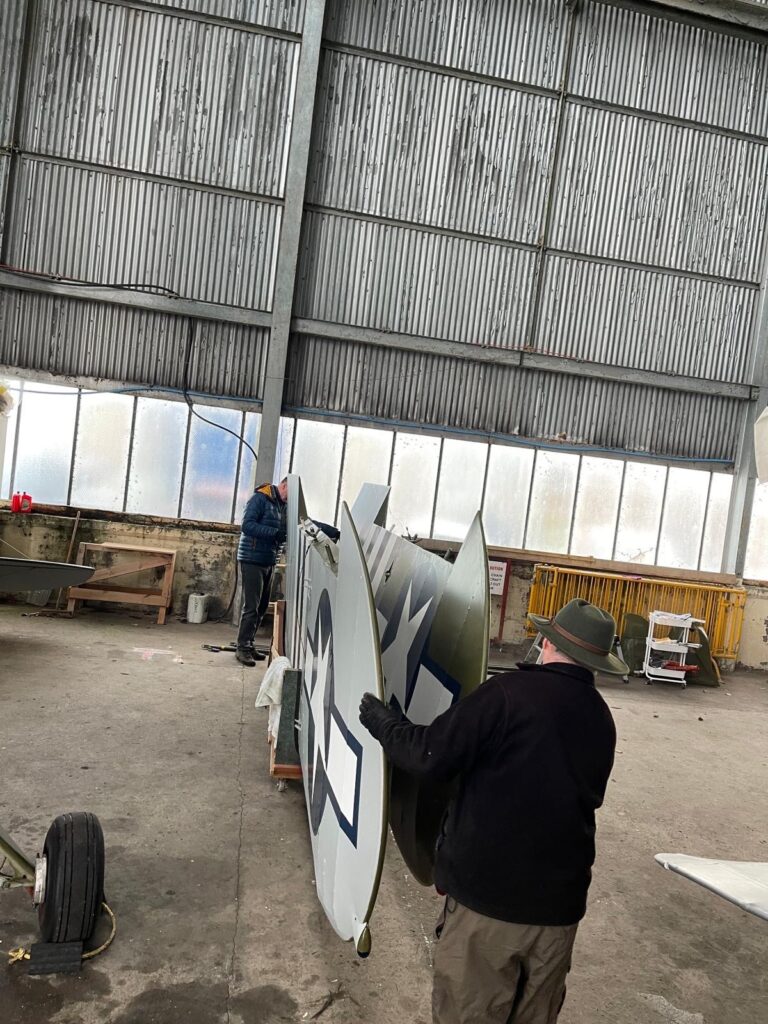
Well, that’s the wings away for assessment and repair…
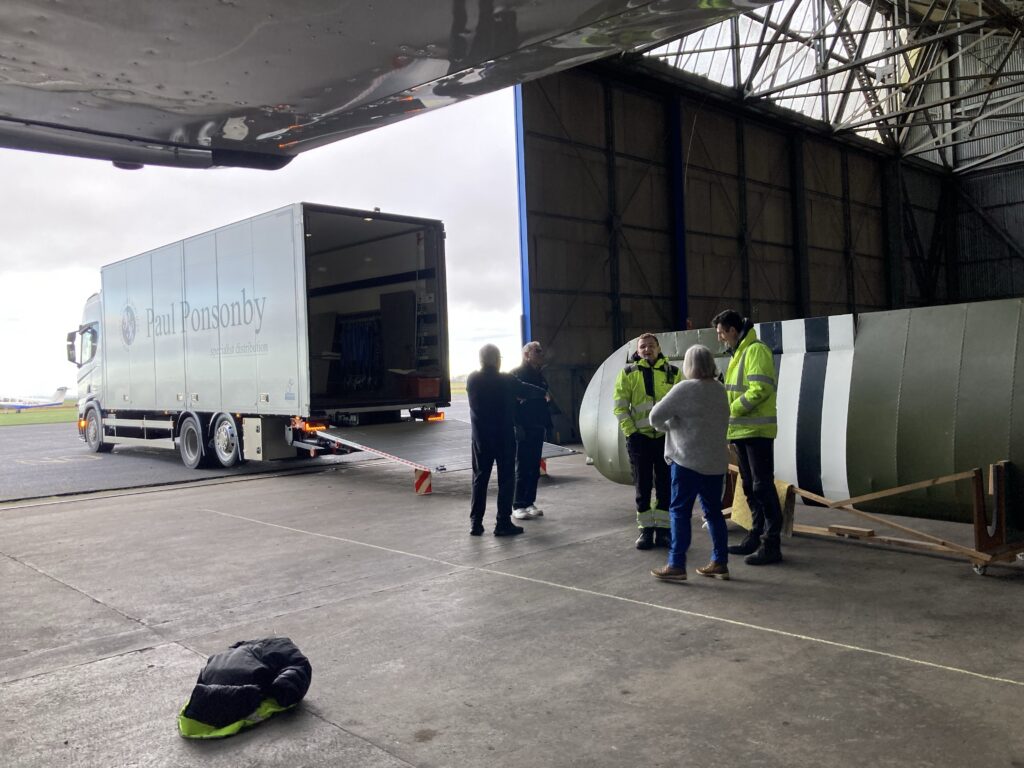
Another team was assembled and the wings walked onto the truck. A new definition of “wing walking”…
We used Paul Ponsonby for the transport. They are a haulage company who specialise in moving aircraft or bits of aircraft around. They advertise in the flying magazines and have a good reputation.
Driver Dave certainly knew his stuff and the wings were soon secured against the sidewalls. Also loaded was a small box of bits from Pete ( who lent us the use of his wing cradle ) – he was sending a couple of Tipsy Nipper ailerons to the same restorer:
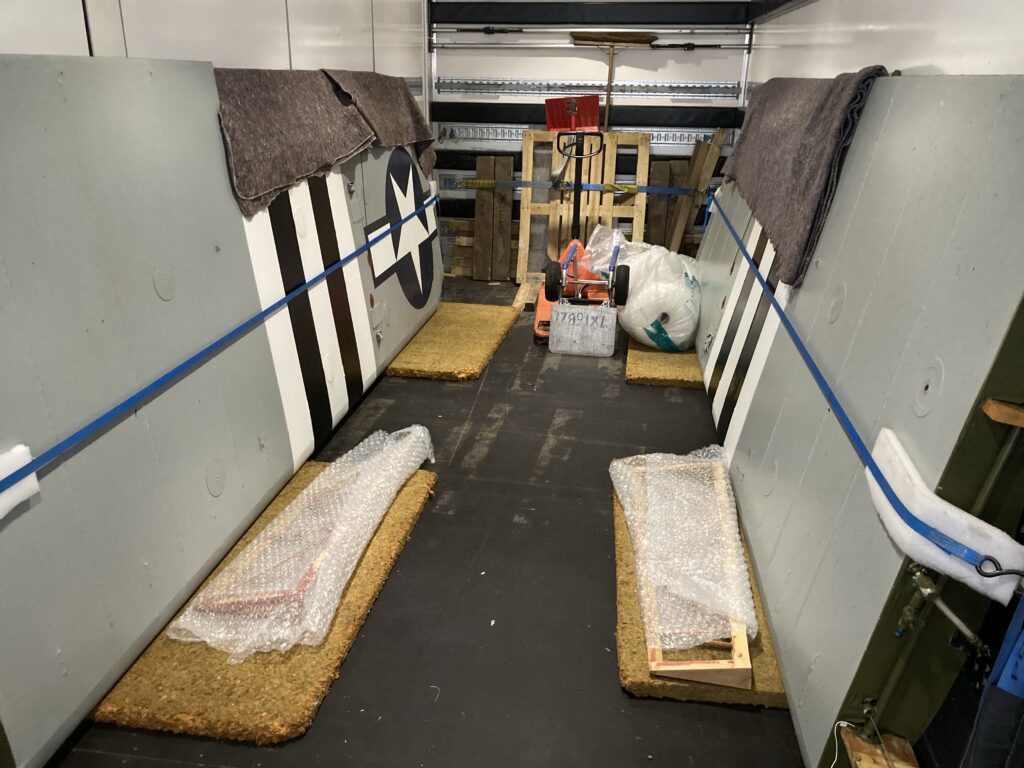
The ailerons are seen here lying loose before they were secured. Just in case you wondered. As you can see there was plenty of room in the truck and it made sense to let Pete take advantage.
Now we wait to see how much it’s going to cost…
In other news I’ve been checked out on a new type:
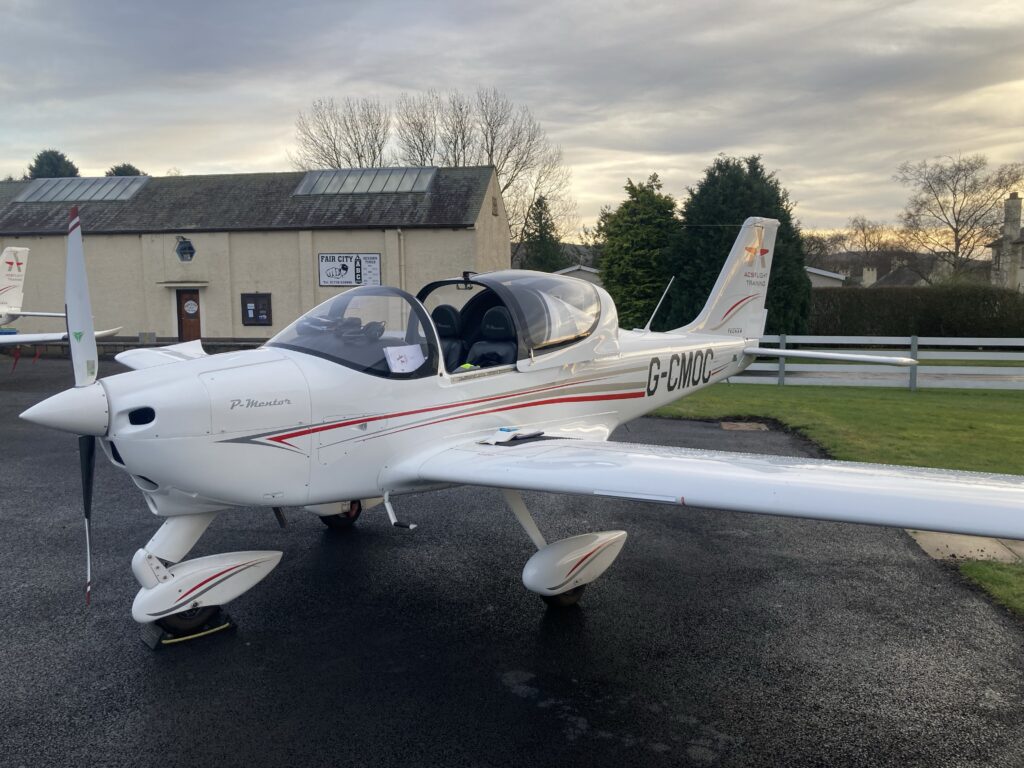
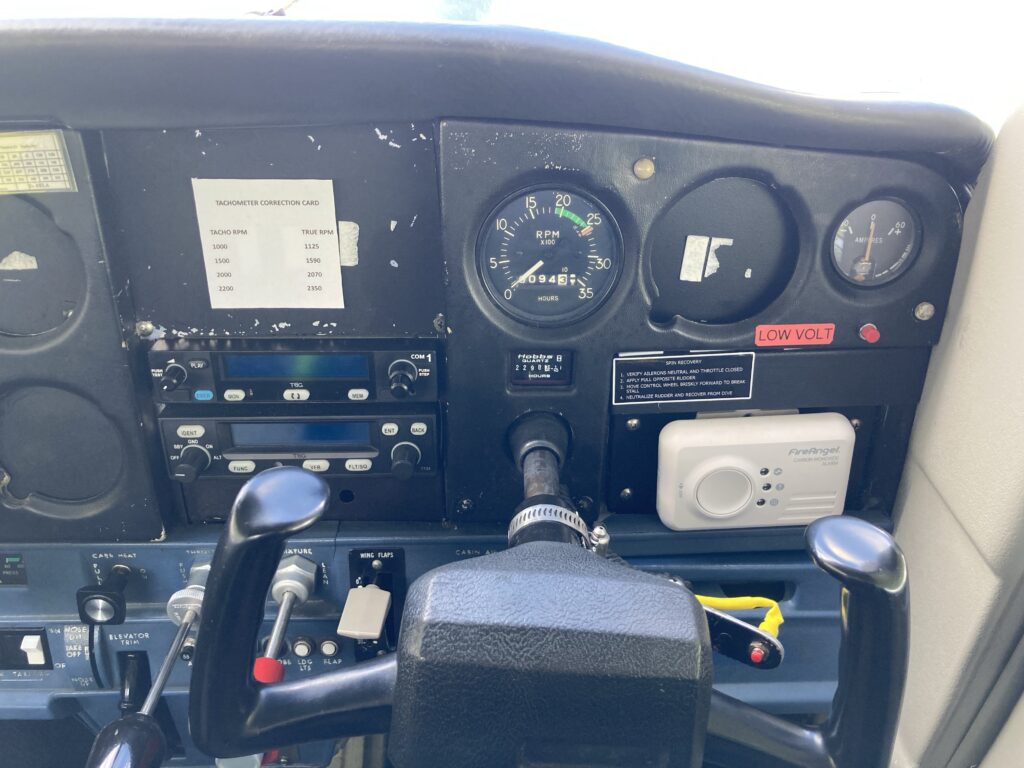
This is a Tecnam P-Mentor. Built in Italy, it’s much more modern than the C152 and PA28 aircraft that I’m currently instructing in…the cockpit is a sea of TV screens:
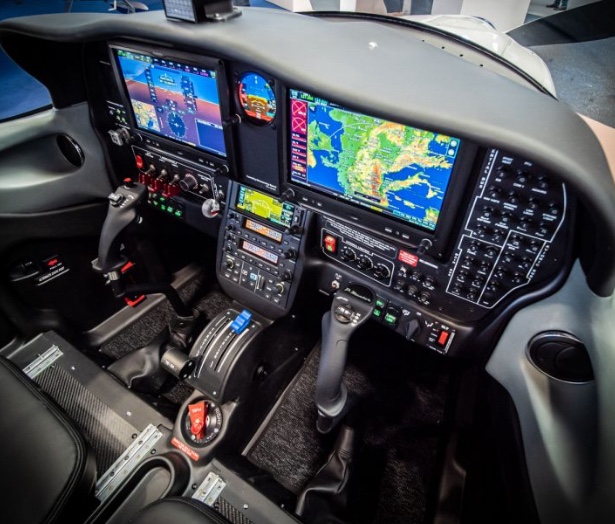
Great fun. Looking forward to flying the Tecnam more in the future.
If the weather would just cooperate..!
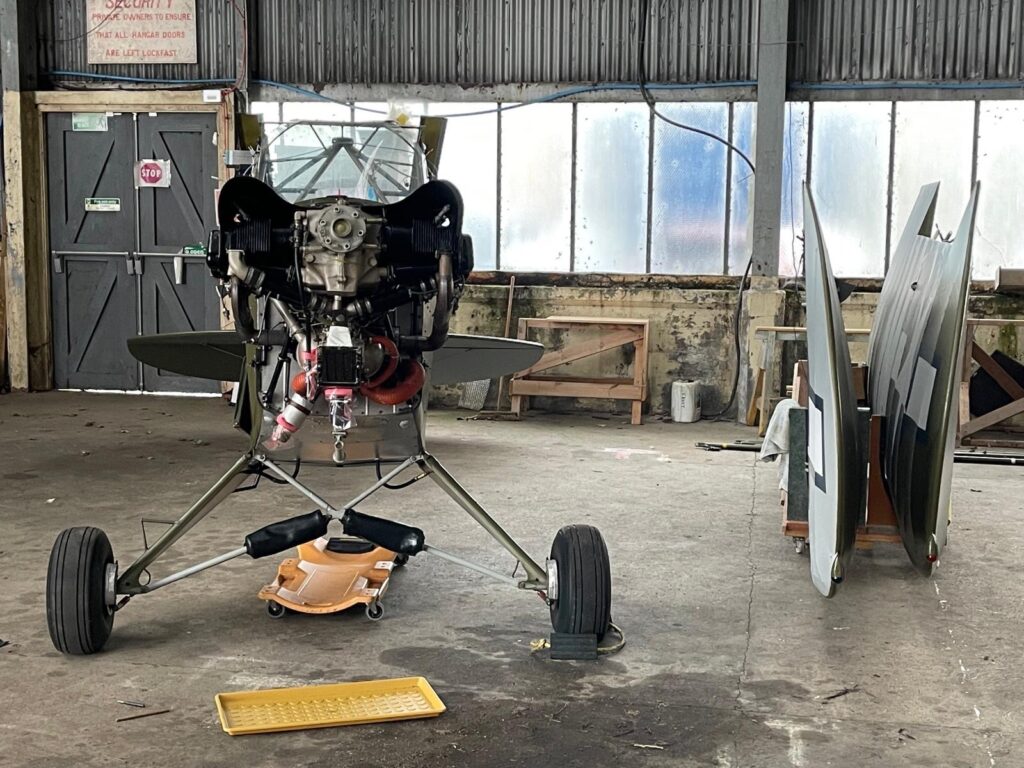
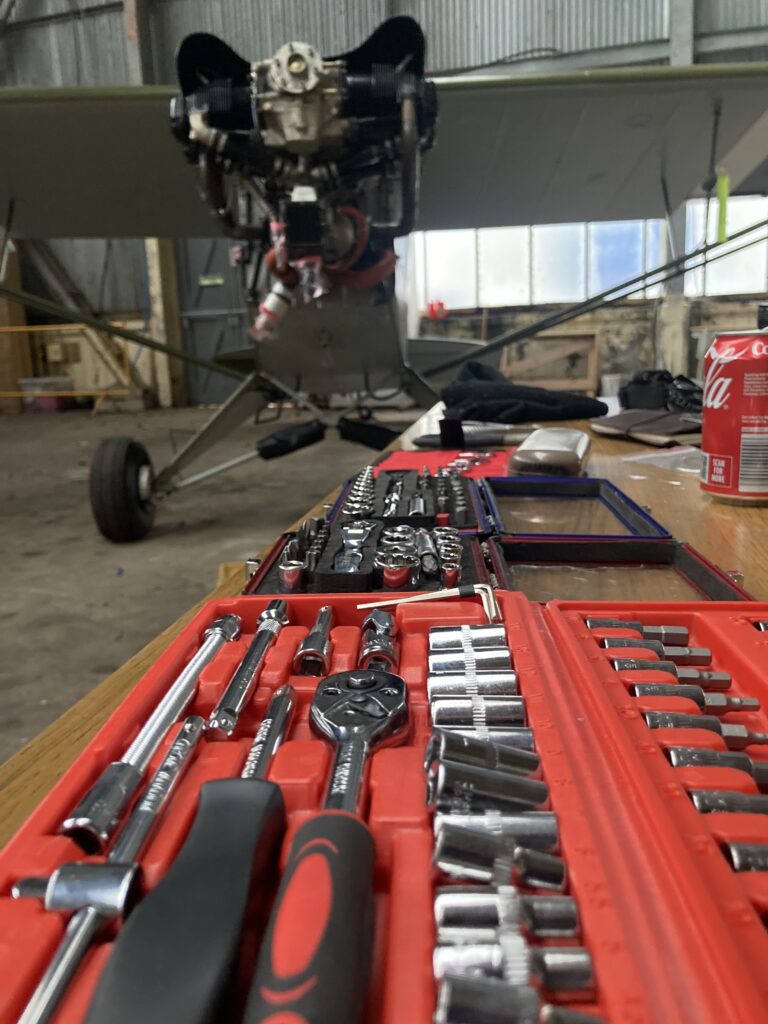
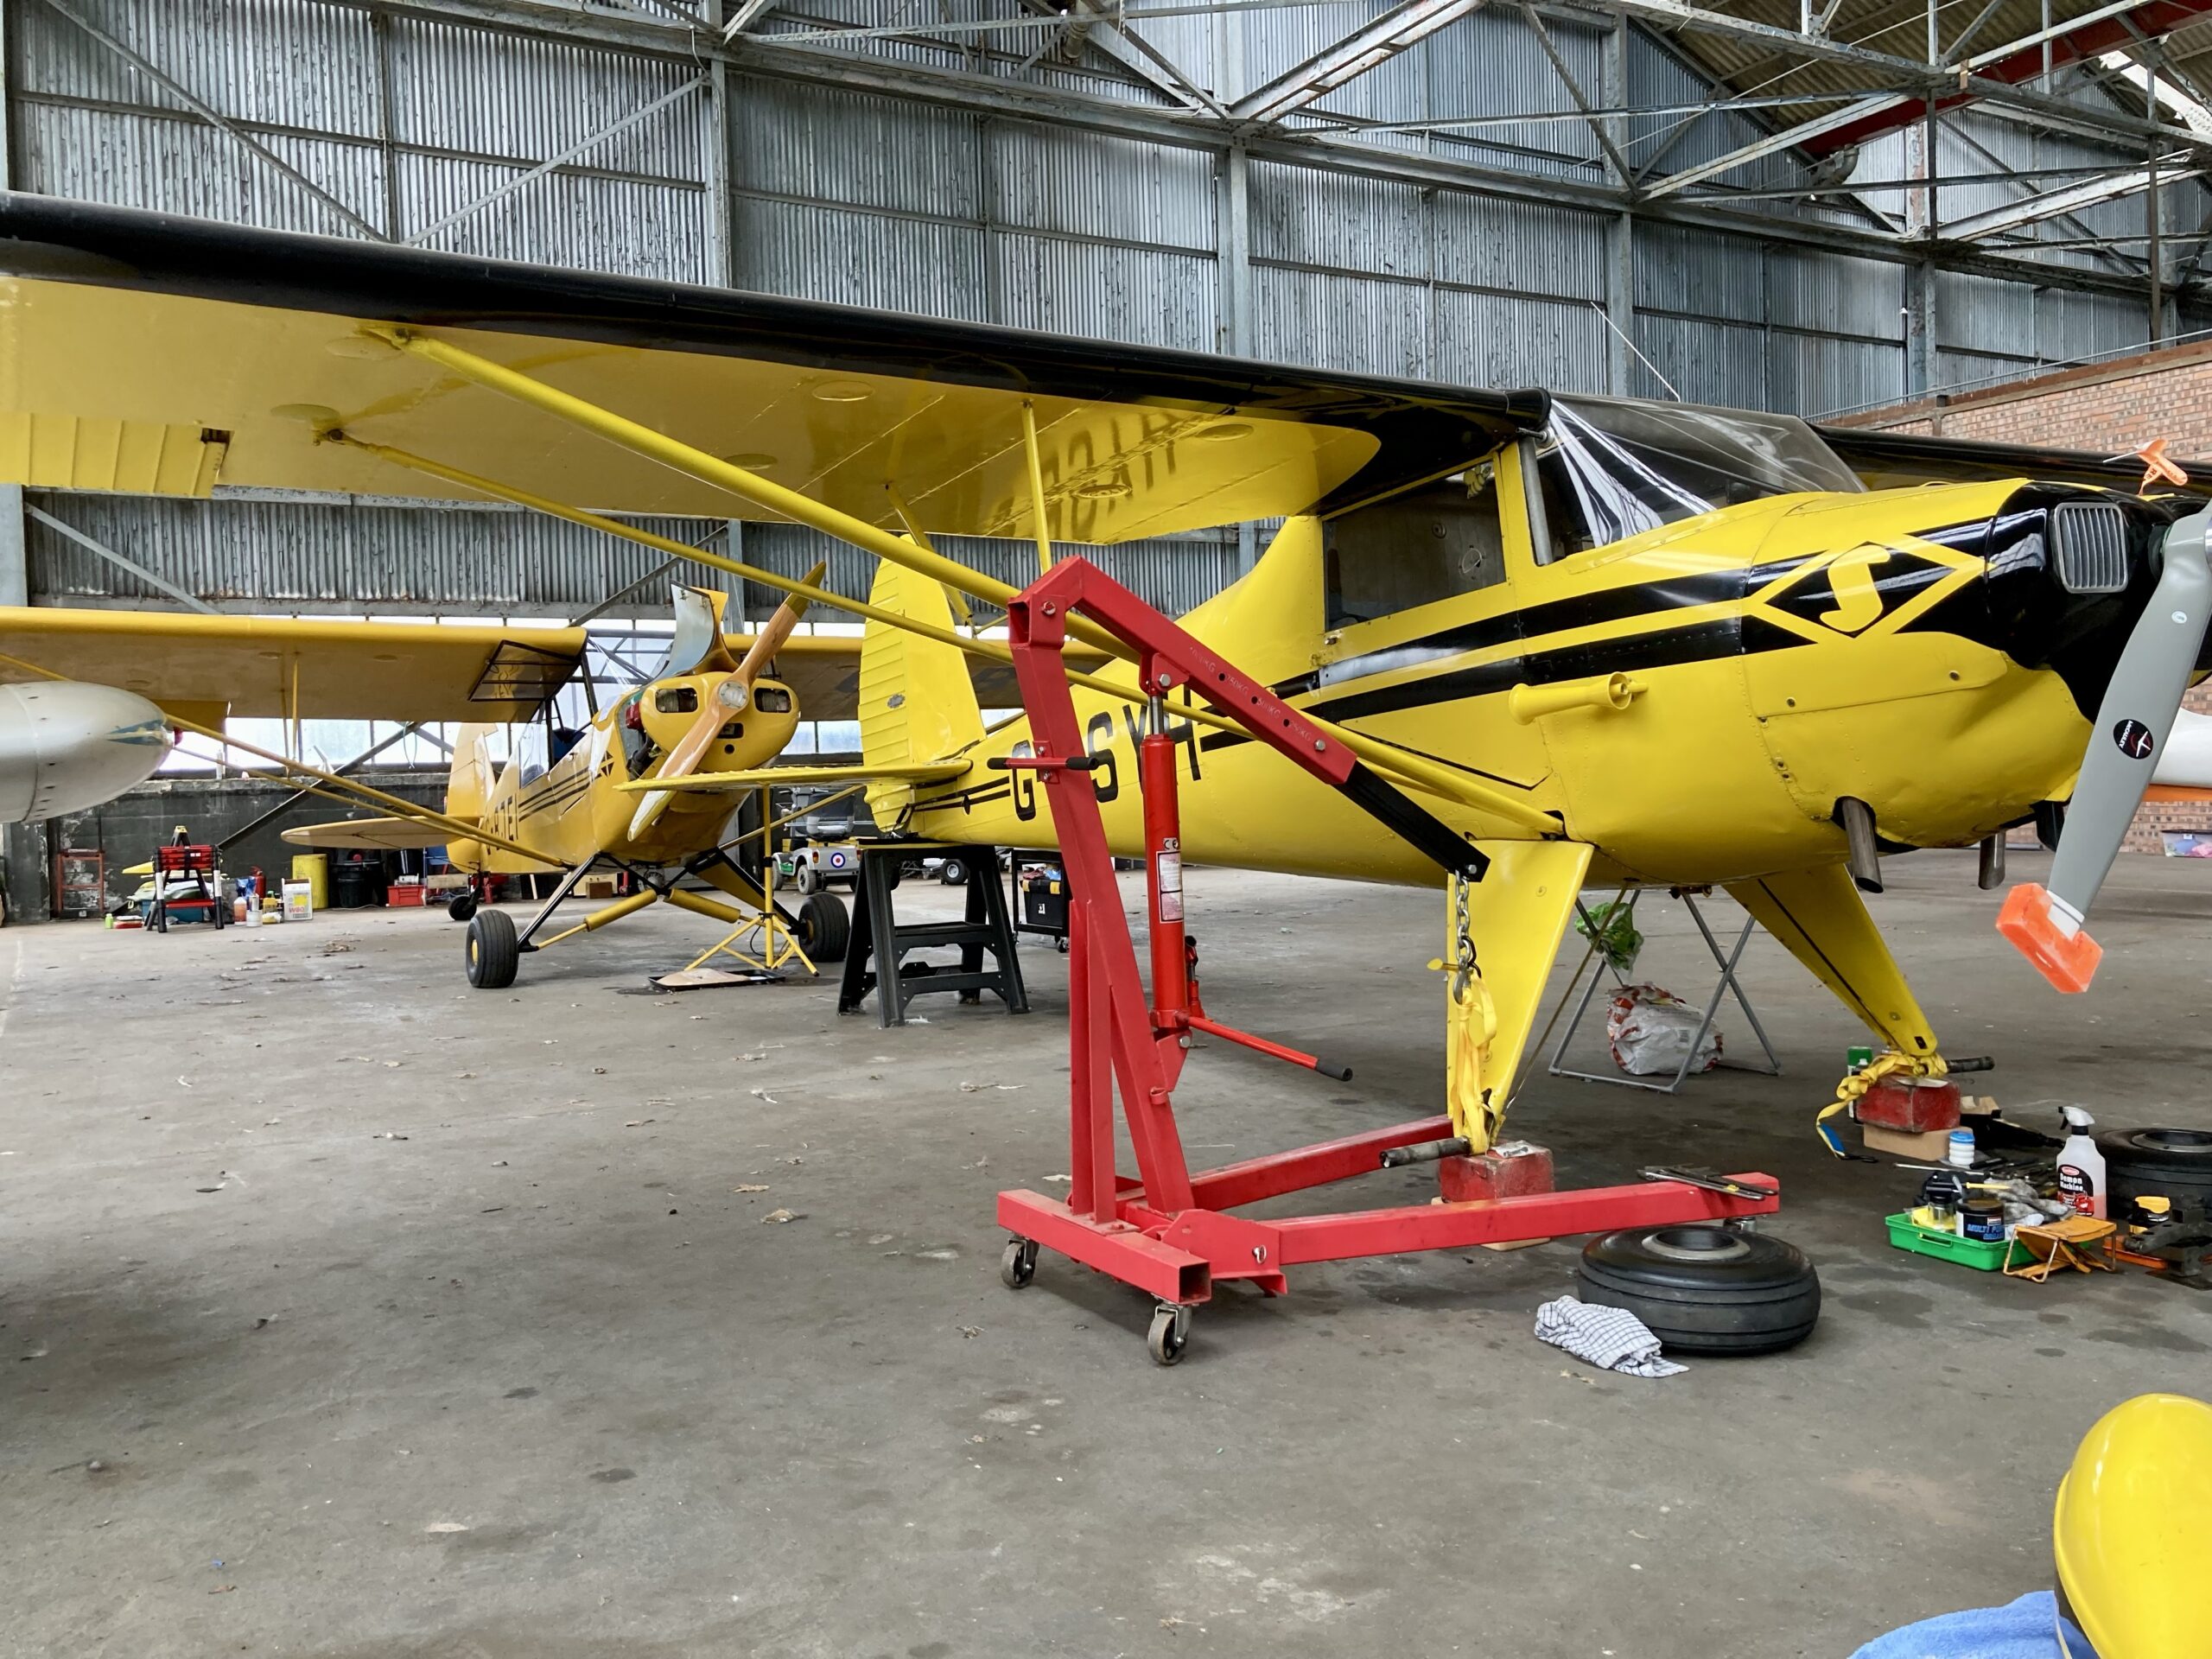
Finally! We’re ready to take the wings off the Cub and get them away for survey and repair. Rather than fabricate a wing stand we managed to borrow one from a friend who has just assembled his RV8 project – amazingly they turned out to be a perfect fit for the Cub wings:
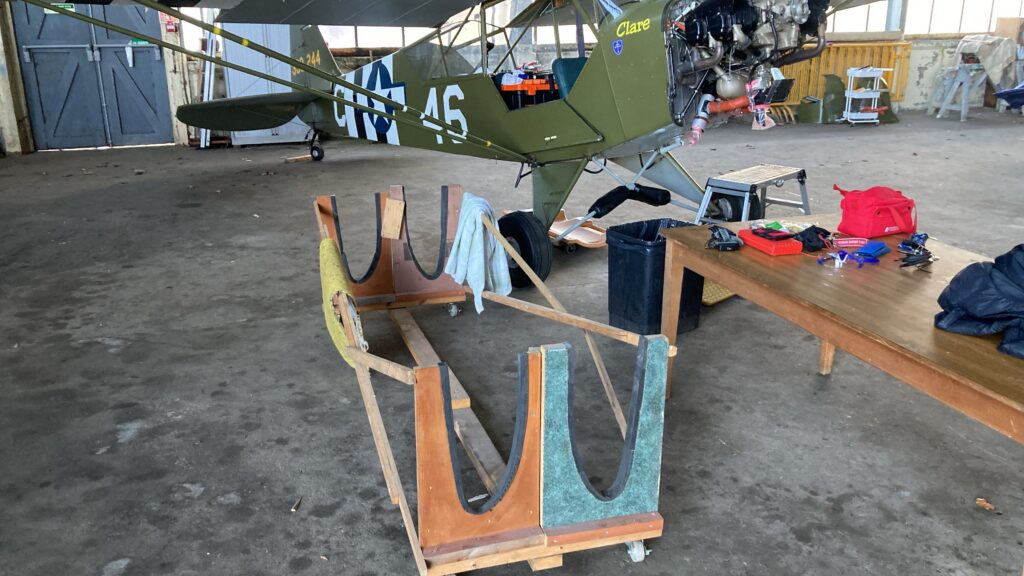
The good thing about being in the big hangar is all the kit that we can borrow to help during the process:
The result…
It only took about 30 minutes, with a little help from a small team we put together:

The cradle has wheels so it was easy to wheel the wings out of the way:
They will wait patiently until the transport turns up. They are off to a specialist vintage and classic engineering company for assessment:
I’m not looking forward to the bill..!
Typical December weather:
…even with some snow thrown in:
It wasn’t all doom and gloom, some aviation was achieved. The RV6 over the fog filled valley of the Tay at Ballinluig:
Back in the hangar and safe from the elements, the Cub inches towards the point where the wings can come off for repair…
Control cables disconnected and ailerons removed to the workshop at home for safe keeping:
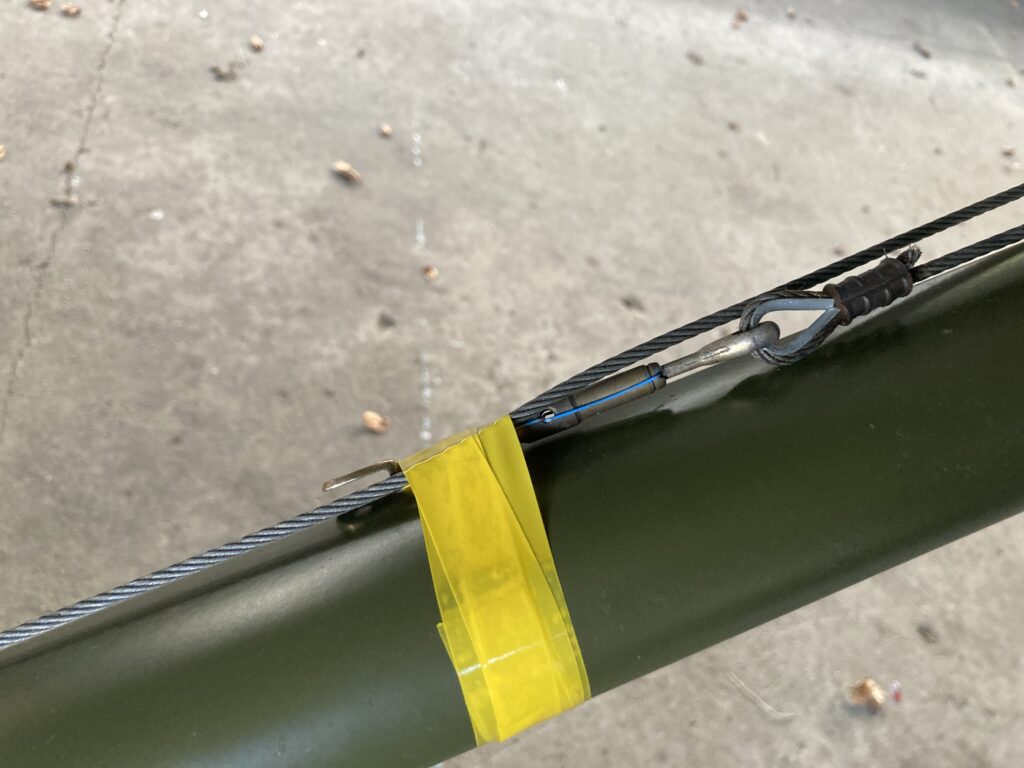
Cables tidied up and strapped to the struts:
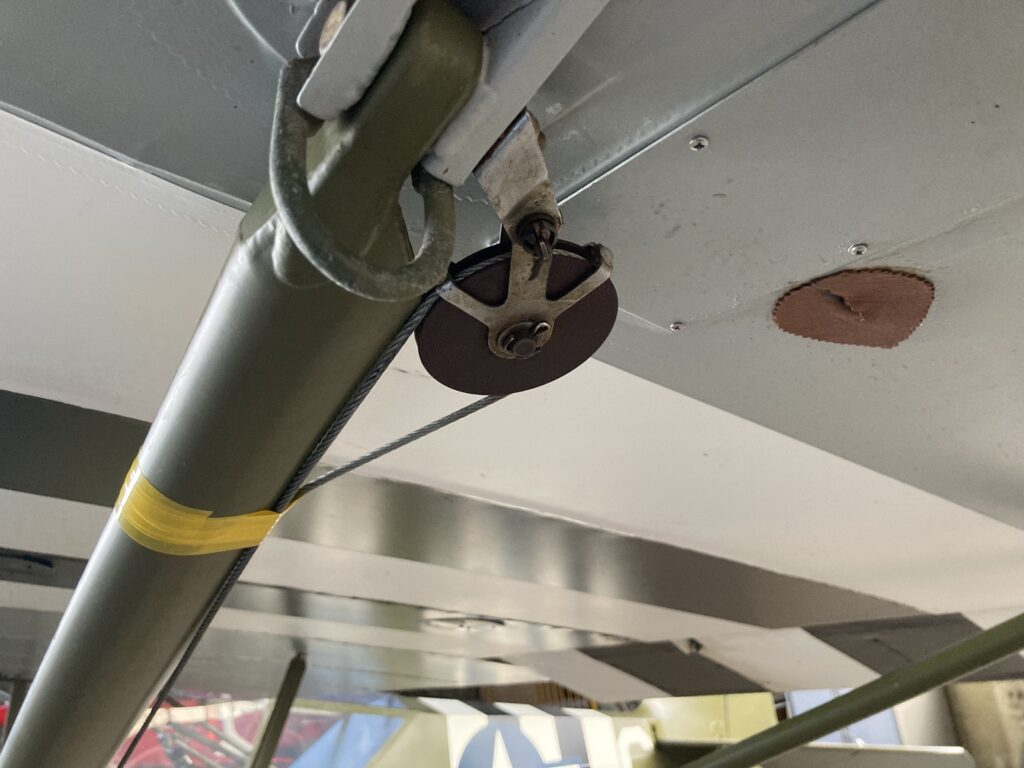
I’ve got loads of yellow tape in the locker for the RV; it’s coming in handy for the Cub now as well…
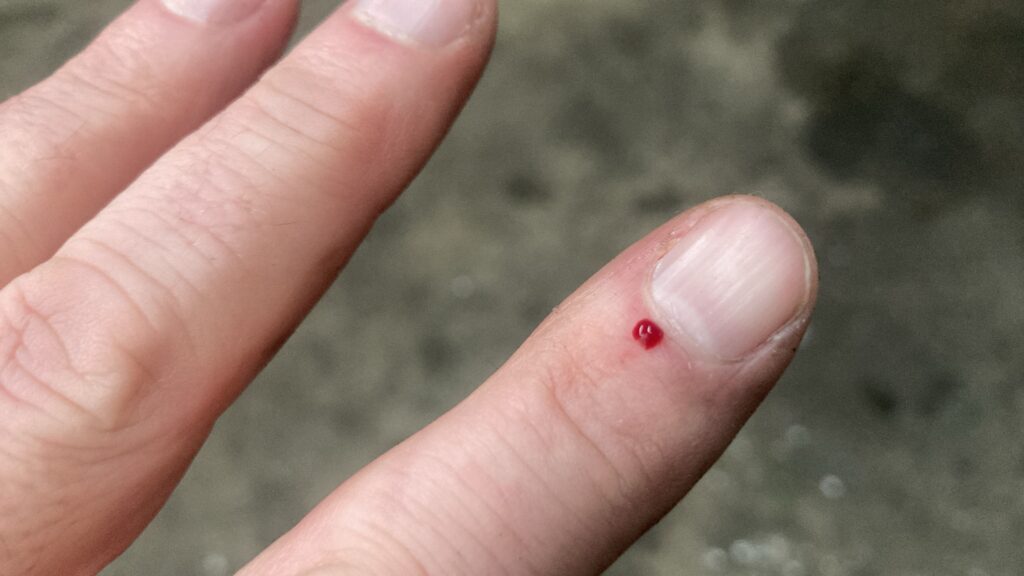
The control cables sometimes do manage to retaliate:
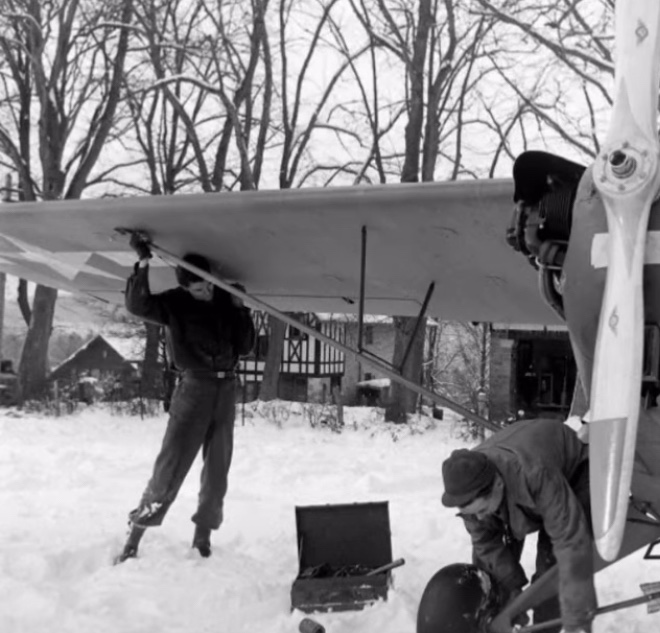
At least we’re doing it under cover and not in the Ardennes in the freezing cold of the Battle of the Bulge…
The freshly printed instructor rating finally got used in anger, here’s Oli my first ever student. He’s off to an integrated course next year with a conditional offer from BA…
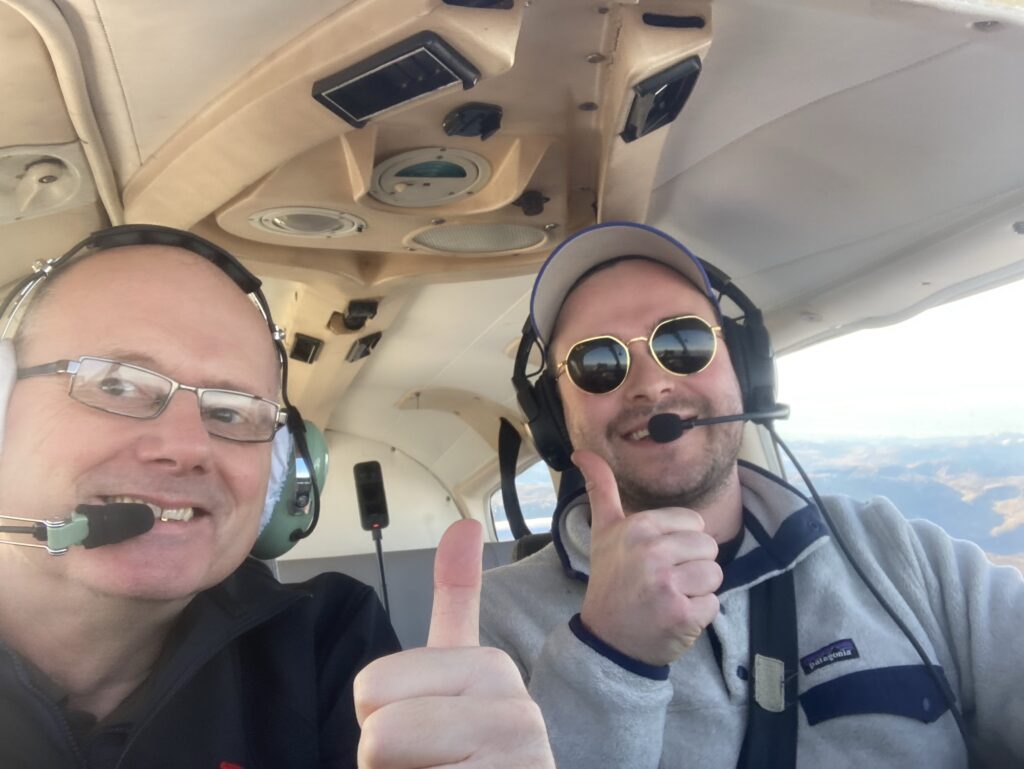
…so in the future I am going to be able to say that my first ever student now flies for BA!
On a cold day, with another student, we just couldn’t get the aircraft started. Even before we climbed into the aircraft we had about 30 minutes of de-icing to do.
The battery was a little inefficient in the cold, the oil was all huddling together for warmth at the bottom of the sump, the inside of the canopy was starting to ice over from our breath and the engine stubbornly refused to start.
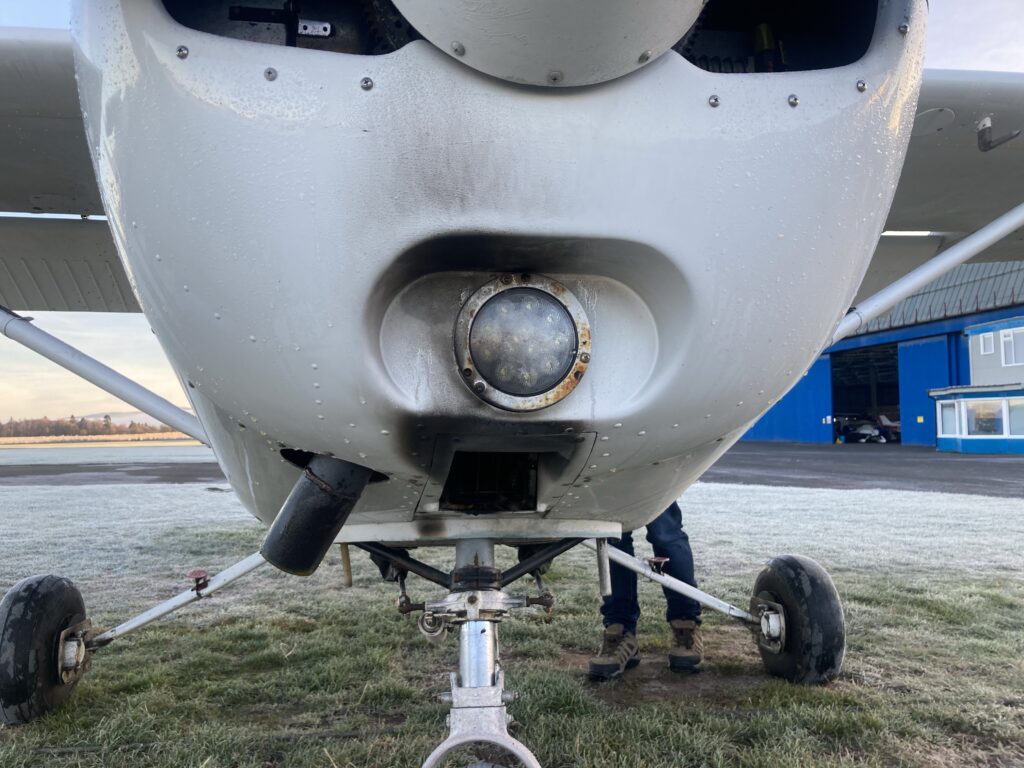
Eventually we overprimed and flooded the carb intake box. The next failed start must have had some flame blowback through the intake valve and like a dog, it went WOOF and we were on fire.
It became obvious quite quickly, a strange smell and people shouting “YOU’RE ON FIRE!” – those were the main clues…
We did the fire drill and jumped out. There was a residual flicker of flame from the carburettor intake filter element – it’s made of foam and impregnated with oil to trap dust and other bogies, so it burns quite nicely.
The last item on the fire drill in the checklist reads:
“Vacate aircraft, taking fire extinguisher with you”
…so naturally I had to go back into the cabin to get the extinguisher and only then were we able to put the fire out.
The extinguishers in aircraft are very effective; one quick squirt to test then another longer squirt to put the fire out. Almost 12,000 hours and that was the first time I had to use an extinguisher in anger. All those fire courses my previous employers put me through were well worth it!
So, yeh. We were on fire. Tried to burn down a Cessna. Tough old birds, we didn’t manage to complete the task…despite forgetting the extinguisher.
Happy New Year! Both of you…
Perth airport’s most recently qualified instructor…
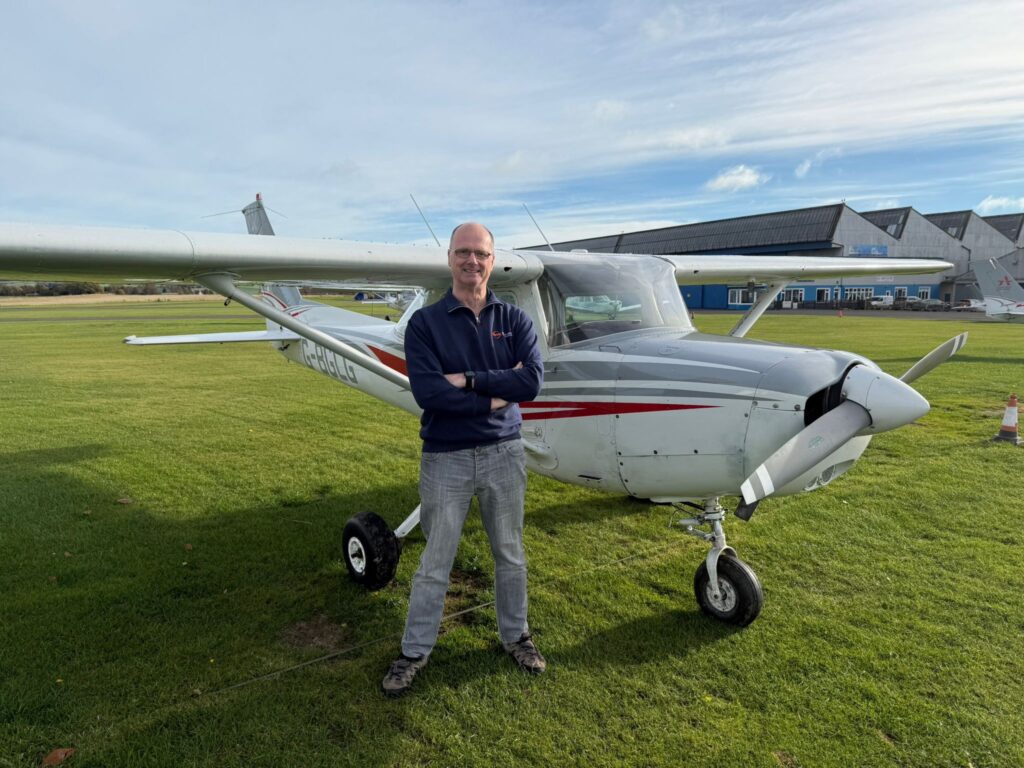
And here’s the proof:

The boss of the flying school got me a present to mark the occasion. How did he know they are my favourite? He must have spoken to the paramedics…

Taking into account the cost of the course, we worked out that each Jaffa Cake was worth about £600.
Still ate them though…
This has been my view for most of a very busy September and October, learning to fly a from the “wrong” seat…
…trying to synchronise my thoughts and actions and words to learn how to teach.
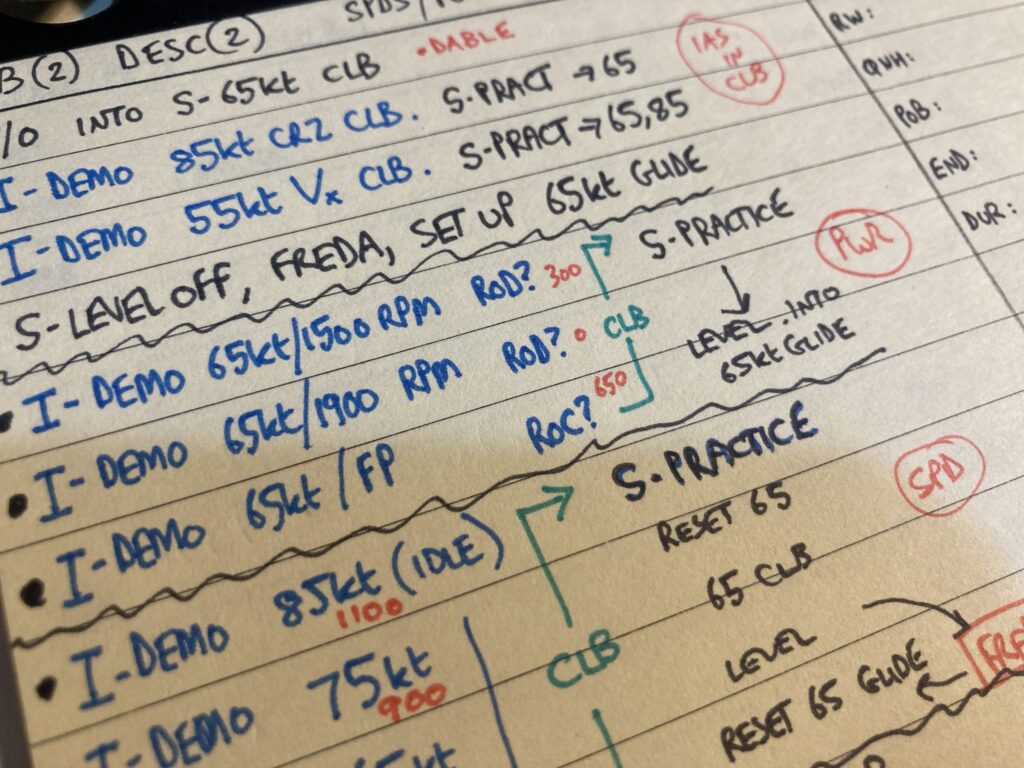
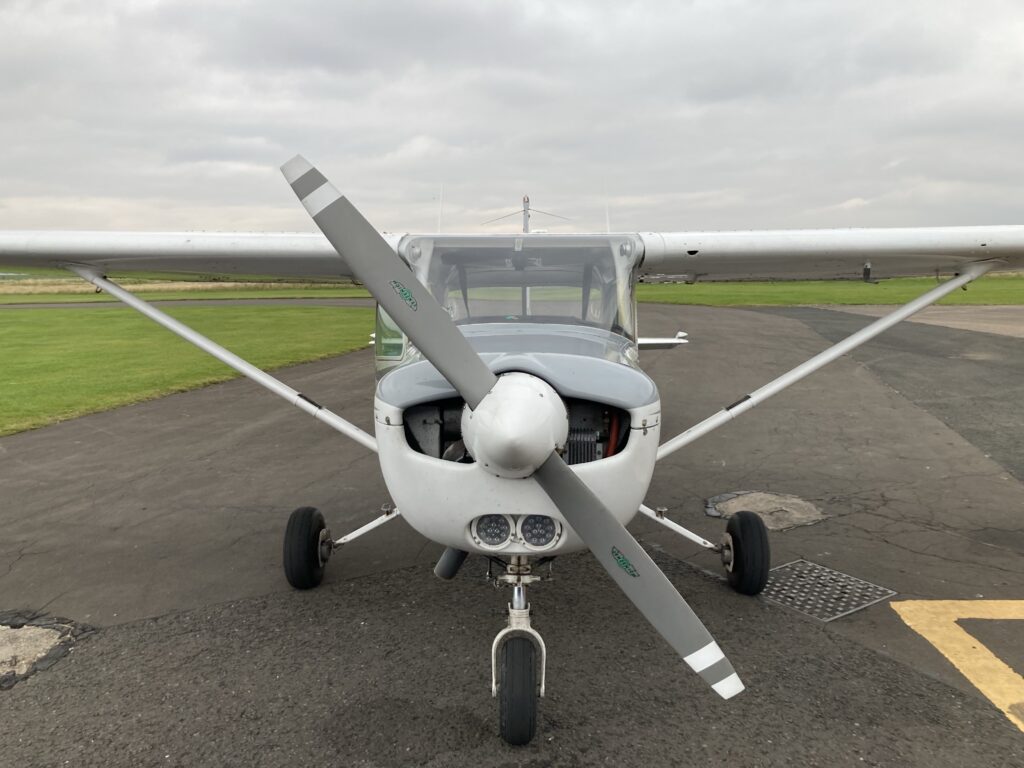
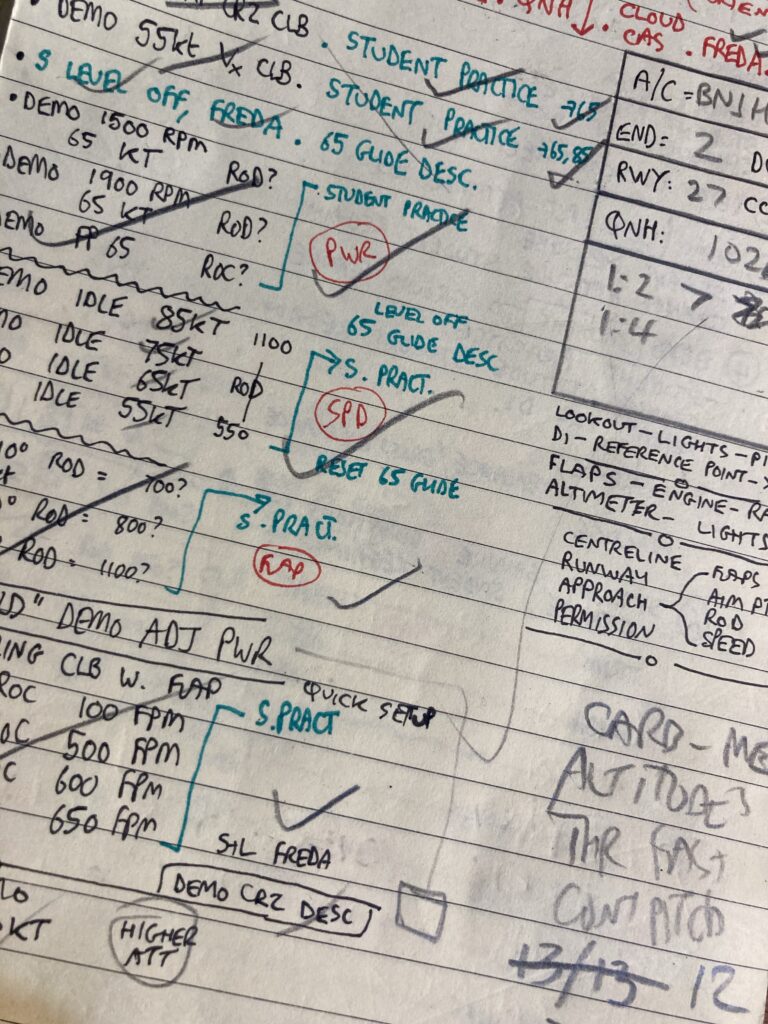
…It took ages to prepare lesson plans (above), which together with an hour in the Cessna 152 (below):
…turned into a mess of notes, ticks and scribbles:
Of course the weather does not always cooperate at this time of year…
It was a little windy a few days ago, time to sit in front of the fire and catch up on ground school subjects…

I did manage to get the RV out for a couple of trips, “keeping the oil warm” is my excuse. It was great to fly along enjoying the view with no pressure to perform, although I did find myself verbalising my thoughts and actions, just as if I was demonstrating to a student:
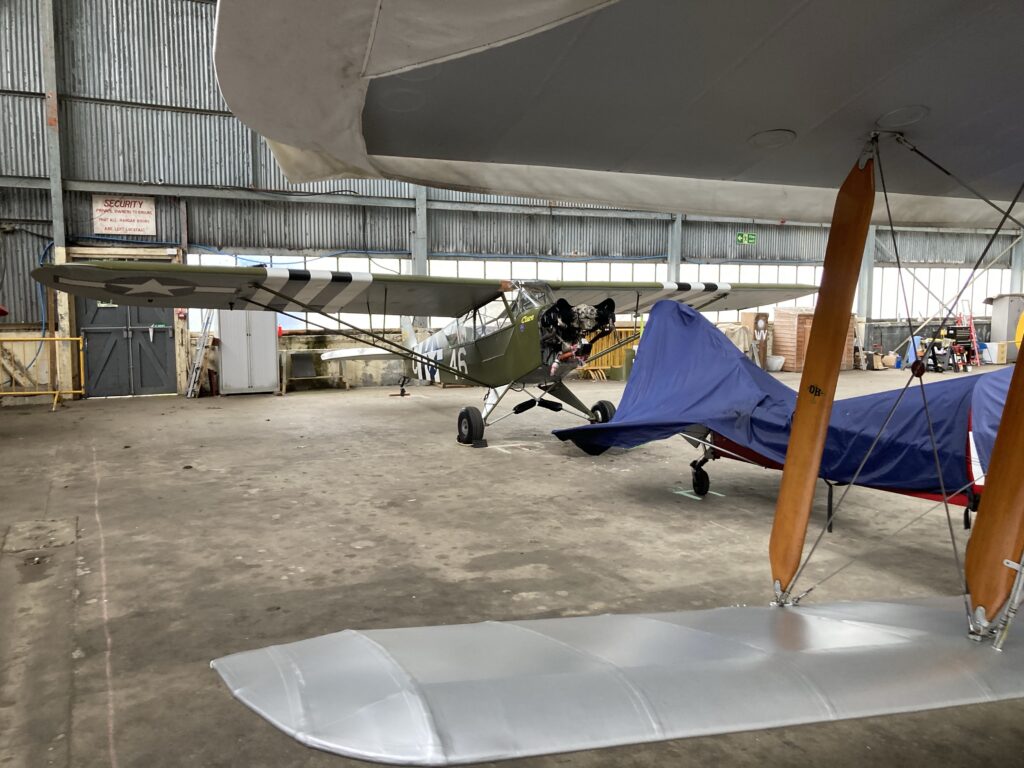
Once the course is finished it will be back to tinkering in the Cub, getting the wings ready to come off. The aircraft has now swapped positions with the Tiger Moth to ensure any Cub work doesn’t block them in:
Oh yes, the “Beatson Turns”…it seems I misheard. The term is “beats and turns”, like in a sailing dinghy, beating across the wind, then turning and beating across the wind in the opposite direction. The term was mentioned when we were doing glide approaches…if you are too high you can do s-turns to increase your track distance, but this is a modified version where you don’t make much forward progress – a way of losing a lot of height without losing sight of the emergency landing field.
Here was me thinking it was named after some famous instructor chap from the 1920s called Beatson. What a character he might have been…
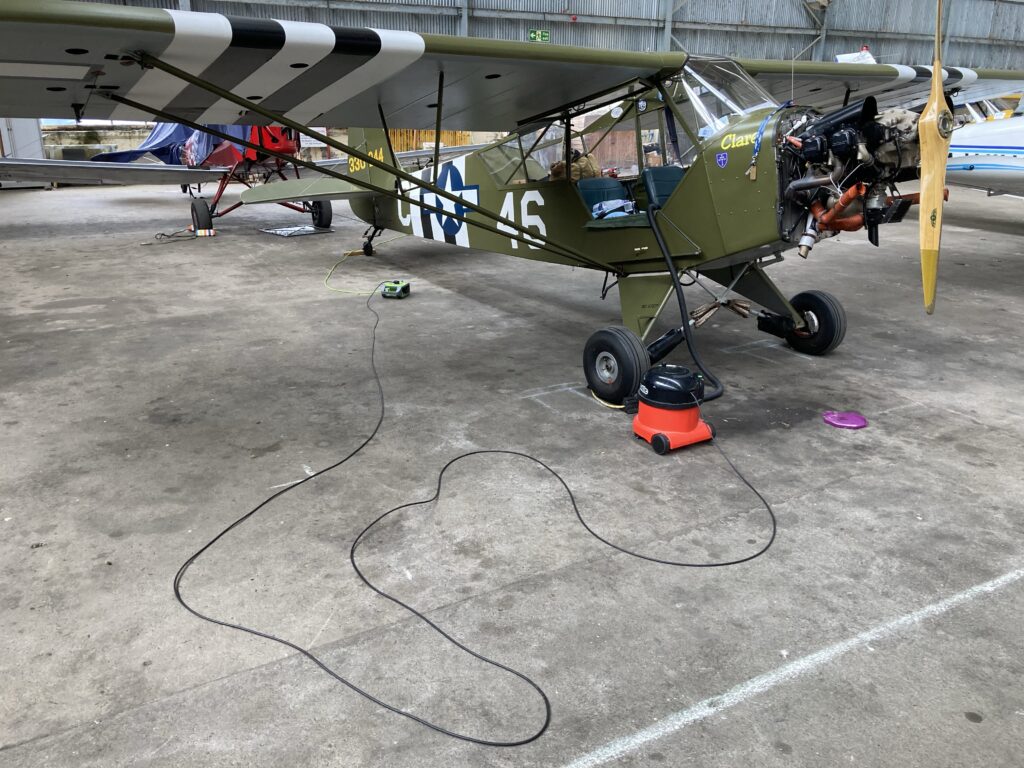
With the plan being for the wings to come off it’s obvious that the aircraft won’t be flying for a while… so we decided to inhibit the engine to prevent corrosion.

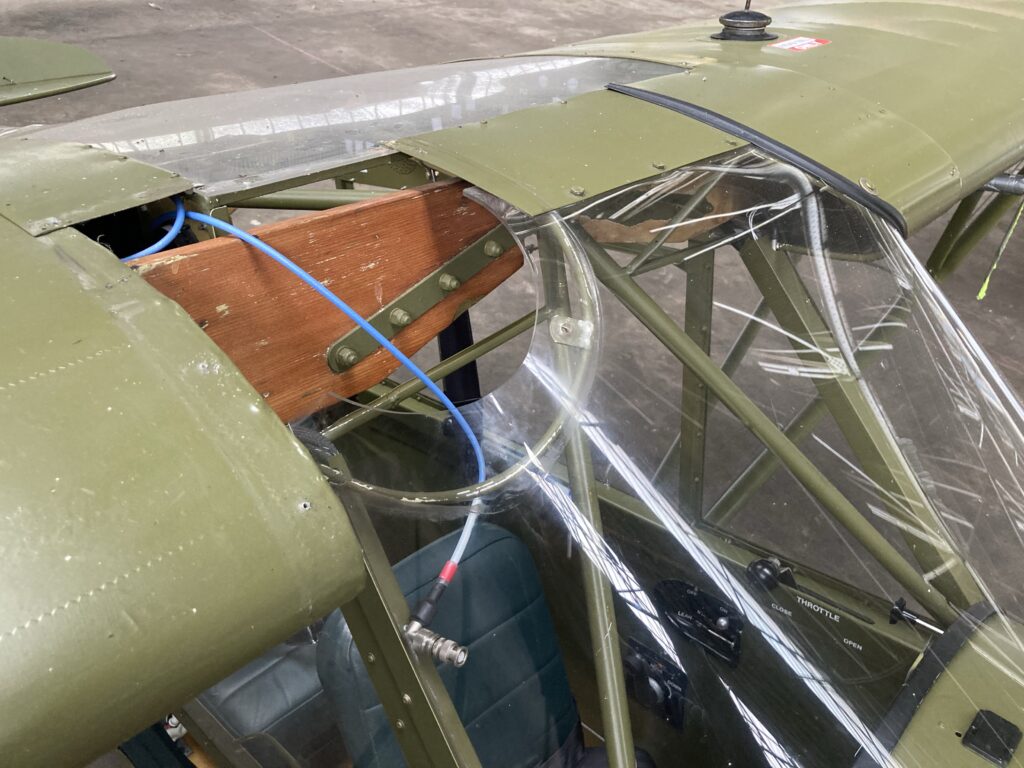
And then we started the process of taking the wing root panels off to gain access to the mounting bolts:
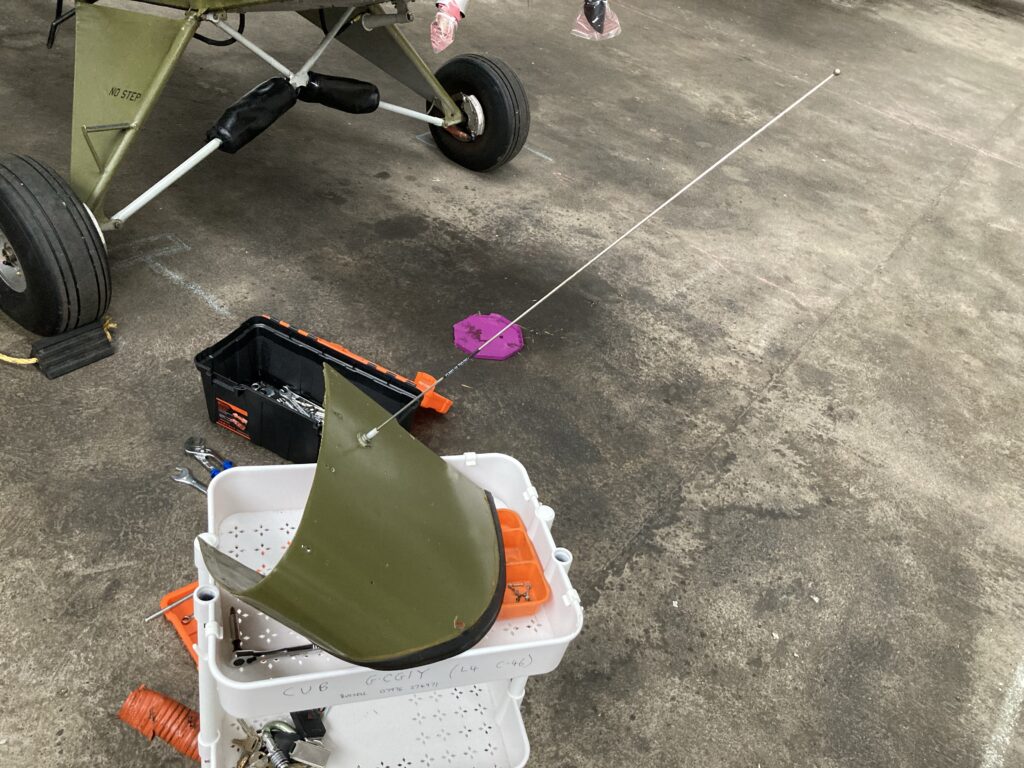
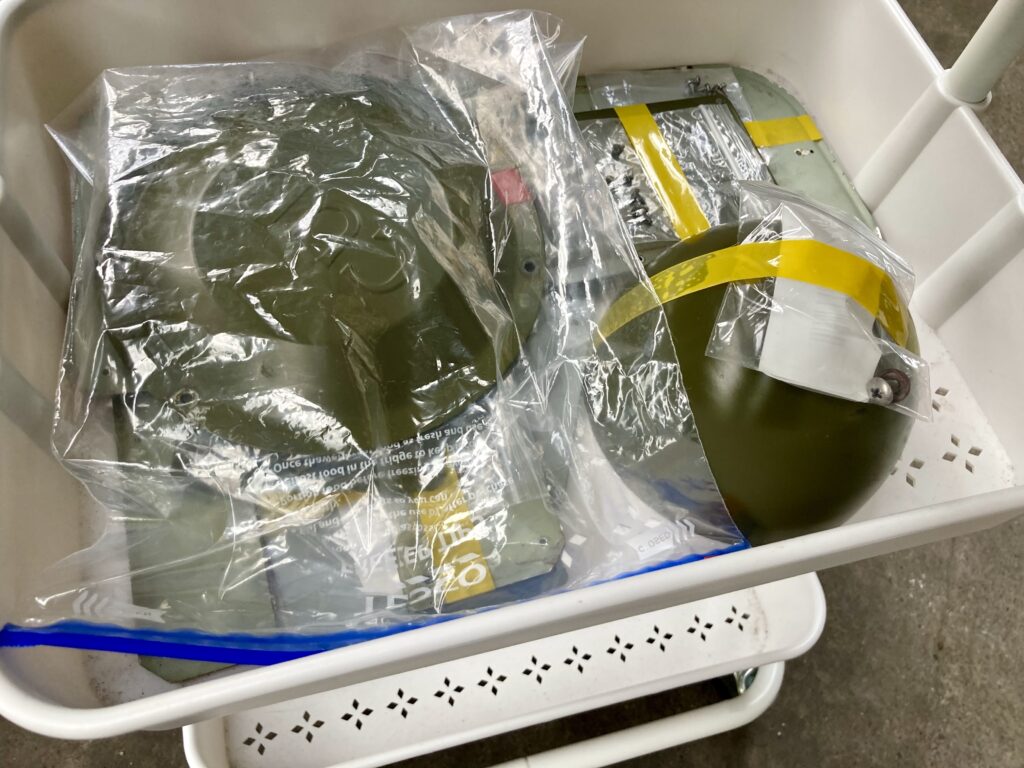
It’s a slow and fiddly process with lots and lots of fasteners, bolts, nuts and screws to keep track of…a lot of sealable freezer bags to be filled and labelled up. The wing roots also contain electrics and fuel lines so there is a bit of thought required, bearing in mind that it will all have to go back together once the wing comes back from the classic aircraft specialists in Leicestershire:
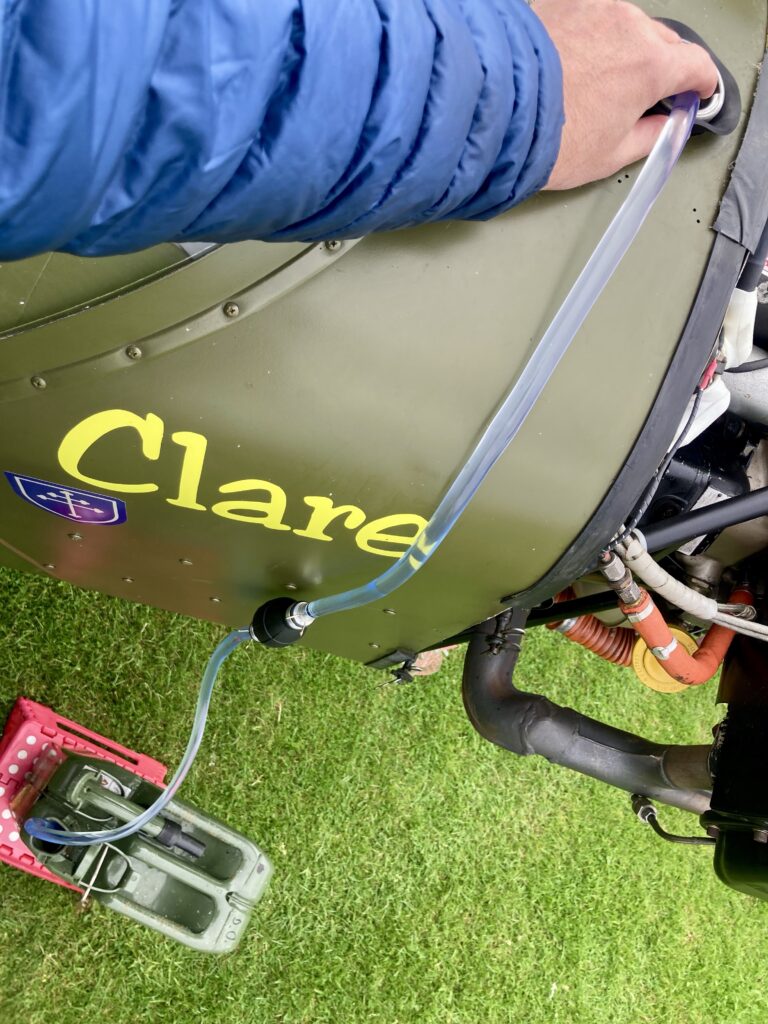
With perfect timing we found the wing crack just after filling the fuel tanks to full for the aircraft weighing. As there was no flying in the foreseeable future there was no point leaving the fuel in the Cub. Both aircraft were wheeled out onto the grass…
…and the tank was drained into a jerry can for transfer across to the RV. It took a few trips as the Cub tank is about 45 litres:
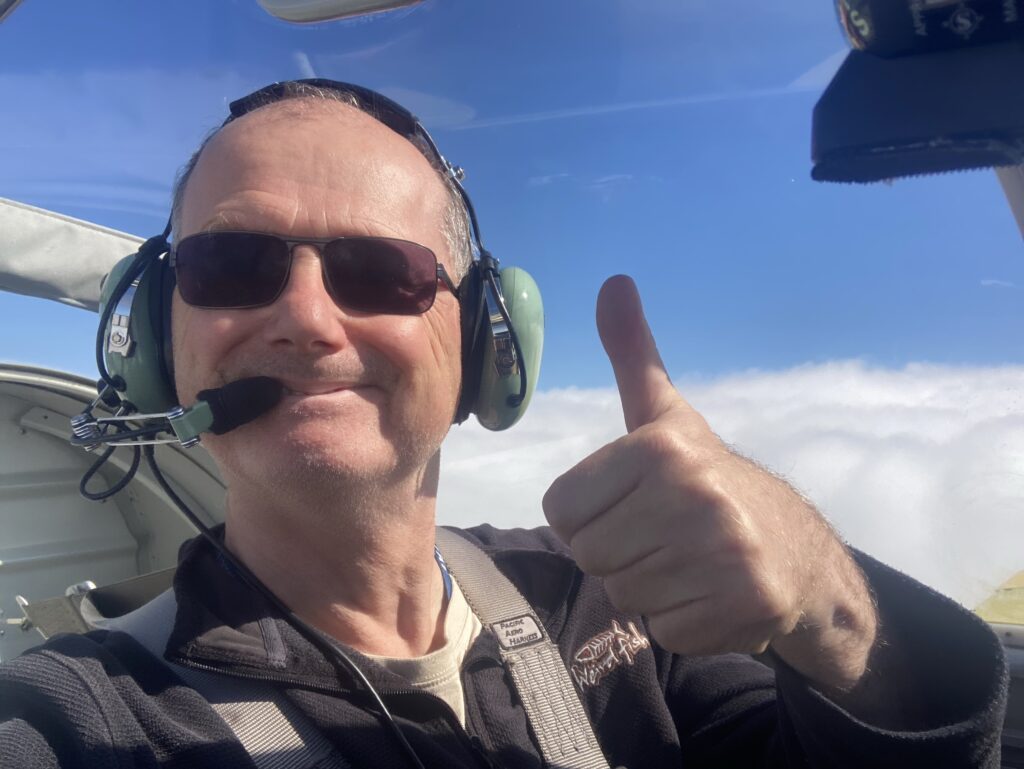
With my green credentials enhanced by recycling the fuel, it was time to fly. Lovely weather over several days…
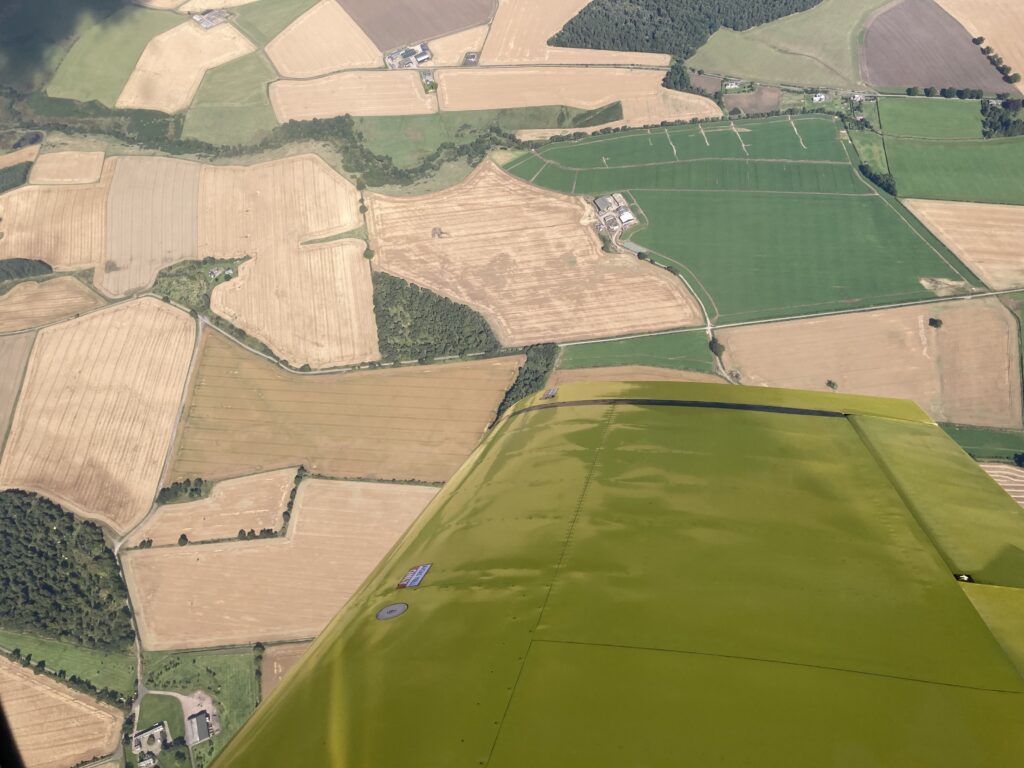
…both below and above the clouds:

I was giving myself a general handling refresher of stalls, practice forced landings and steep turns:
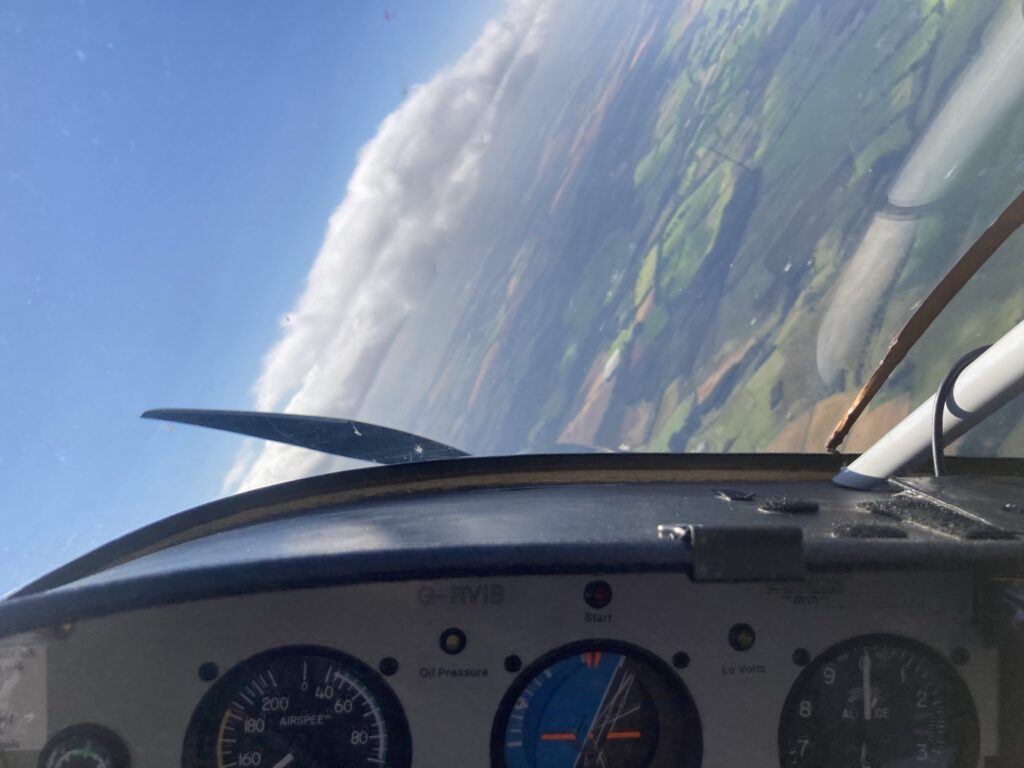
Happy with the performance:
There was a reason to brush up on general handling. By the time this goes out I’ll be half way through the instructor course…
Back to school..!
Continuing the process of moving the Cub from a Certificate of Airworthiness to a Permit to Fly. We had already weighed the aircraft and done the paperwork sift to ensure all was up to date. All the panels came off:

The aircraft got a good clean, inside and out:
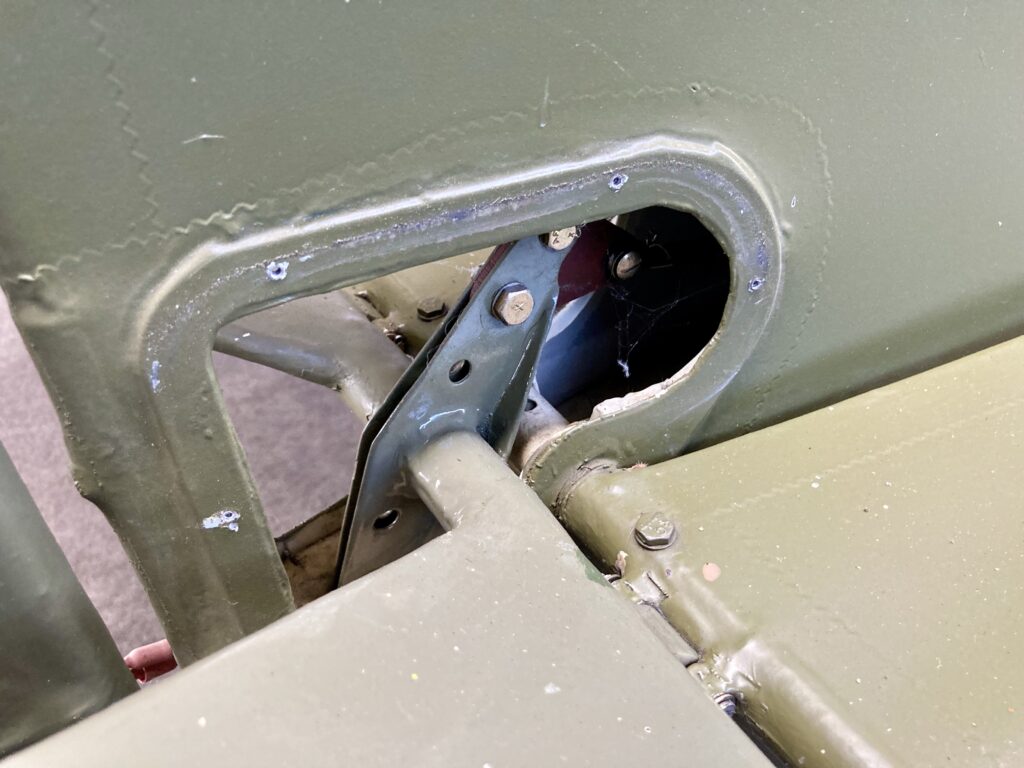
The access hole for inspecting the horizontal stabiliser trim mechanism:
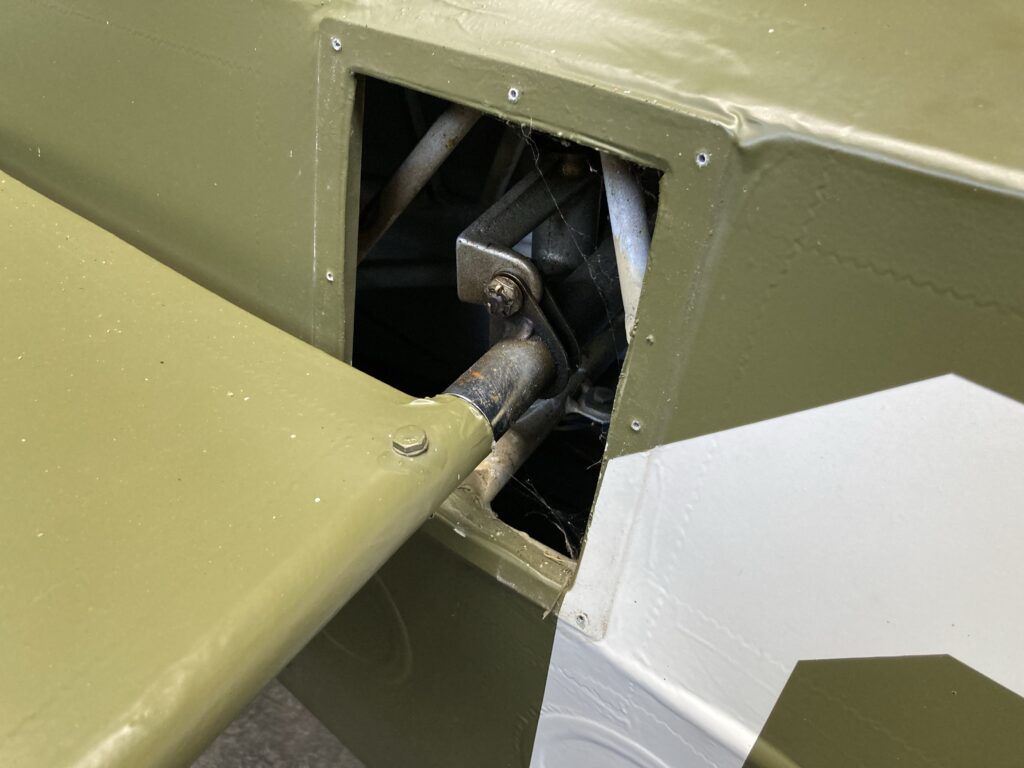
Further back, the elevator control horn and control cable turnbuckles are revealed:
The underside of the wing has about eight inspection holes in the fabric
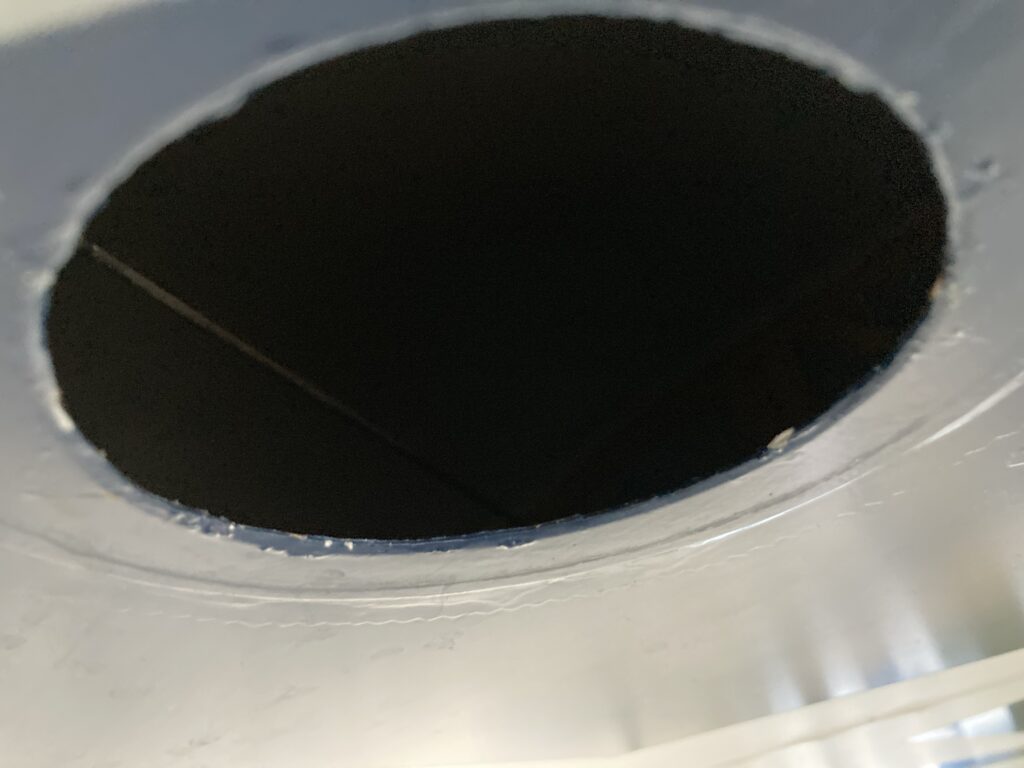
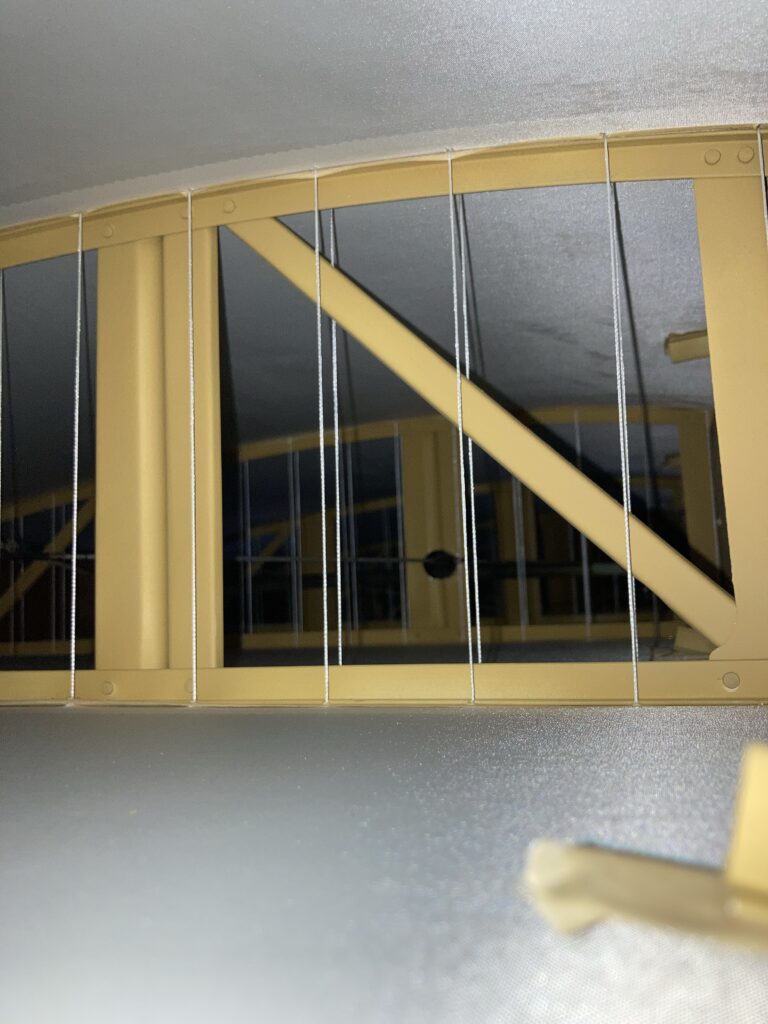
A view inside the wing, taken through one of the access holes. Looking good so far, but see later on…
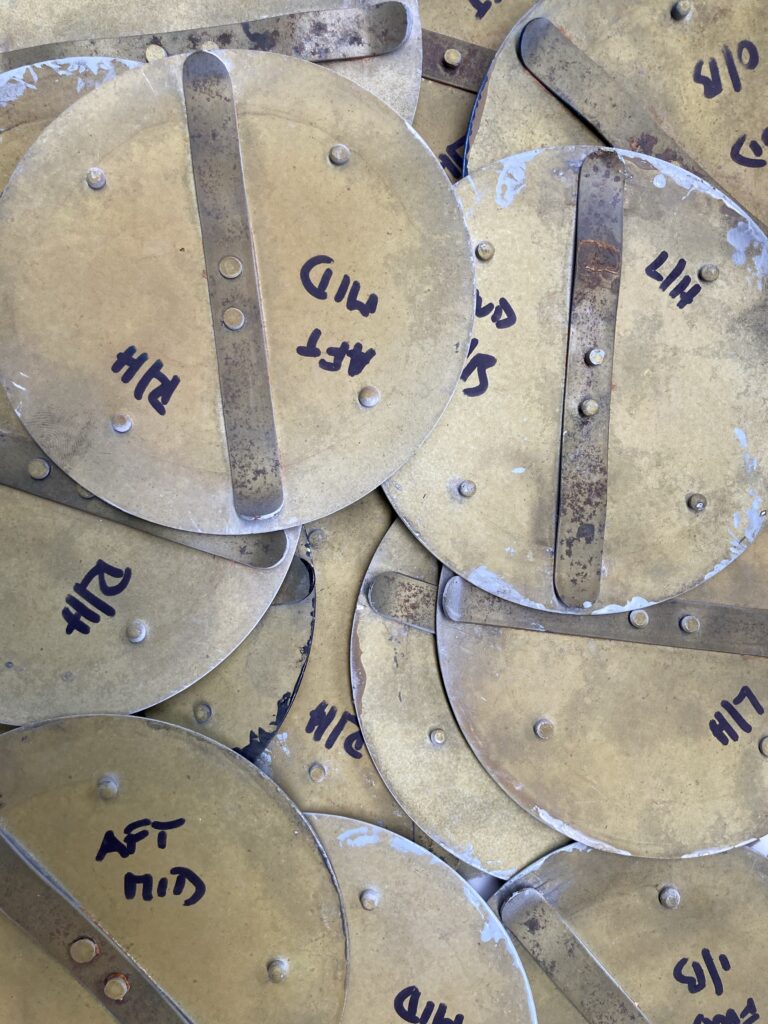
All the circular access discs are marked with their location on the wing…
Trying to keep all the screws with their correct panels involves a lot of plastic bags:
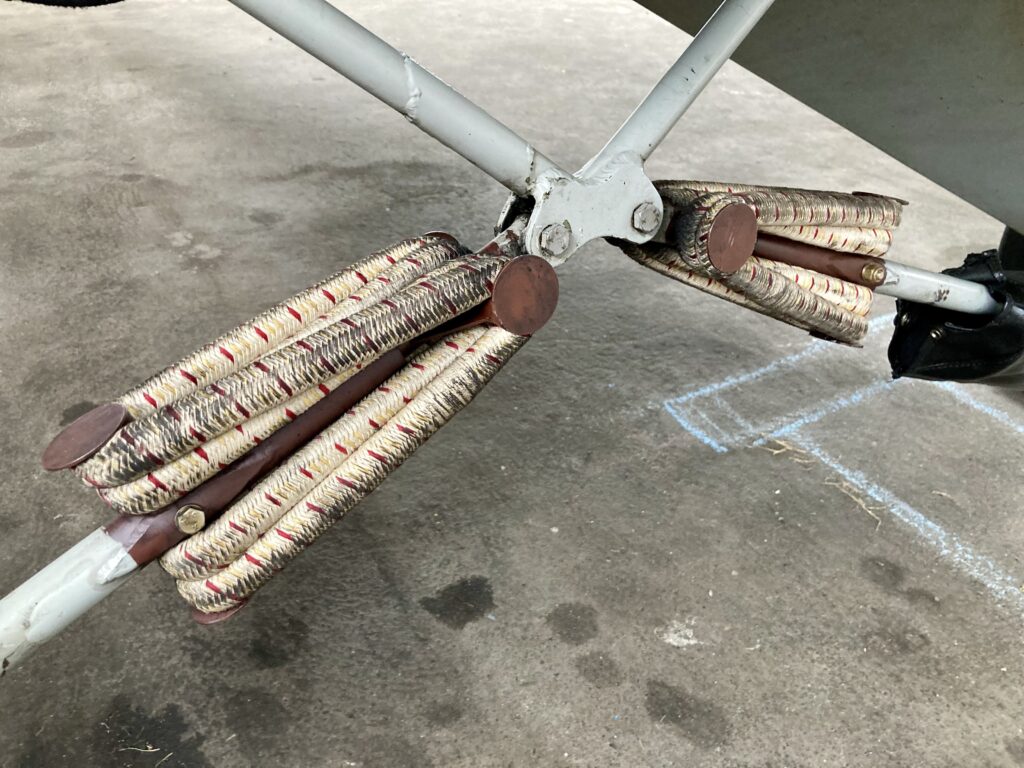
Bungee covers moved aside to inspect the simple suspension system:
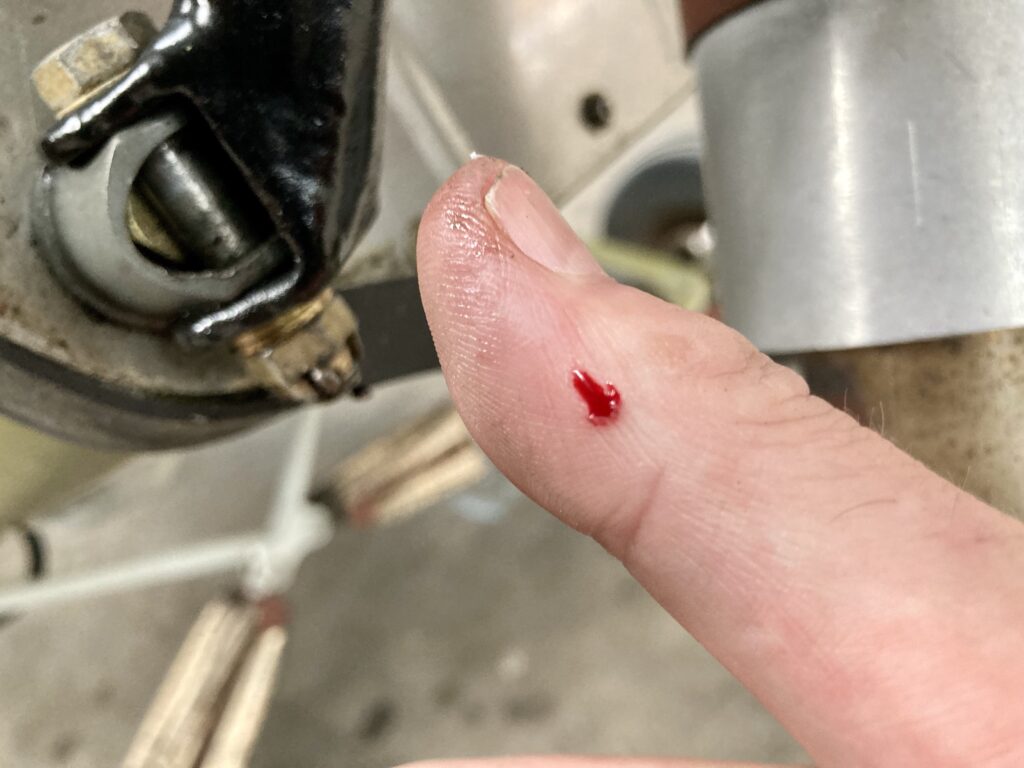
As always, maintaining an aircraft has its risks!
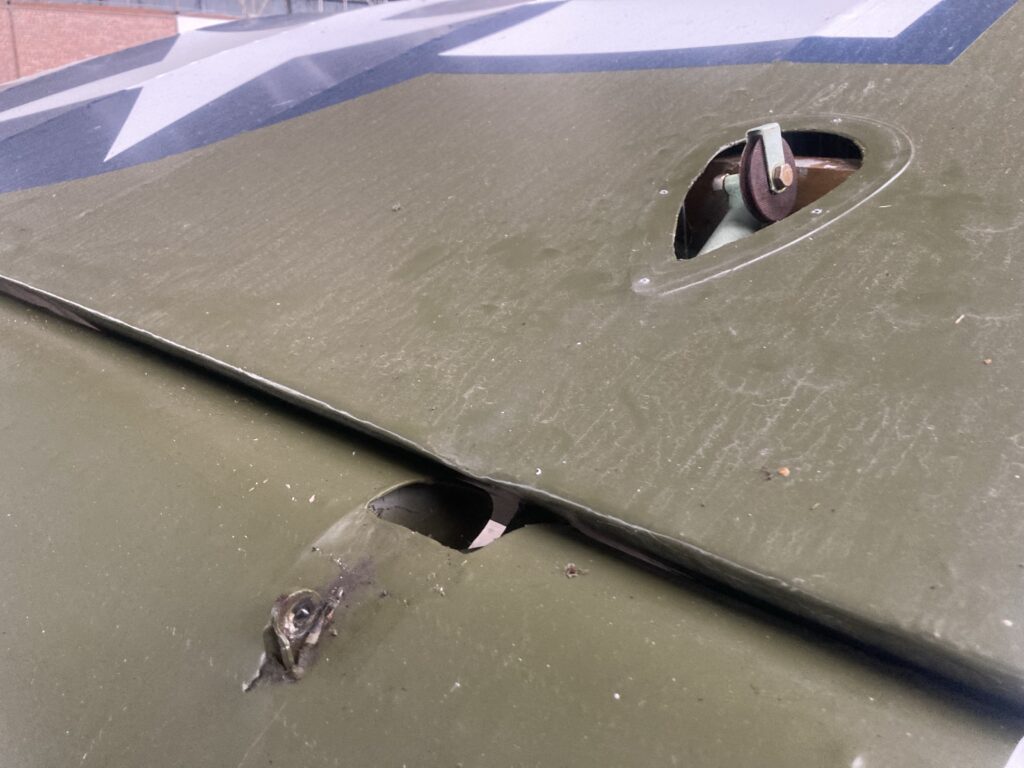
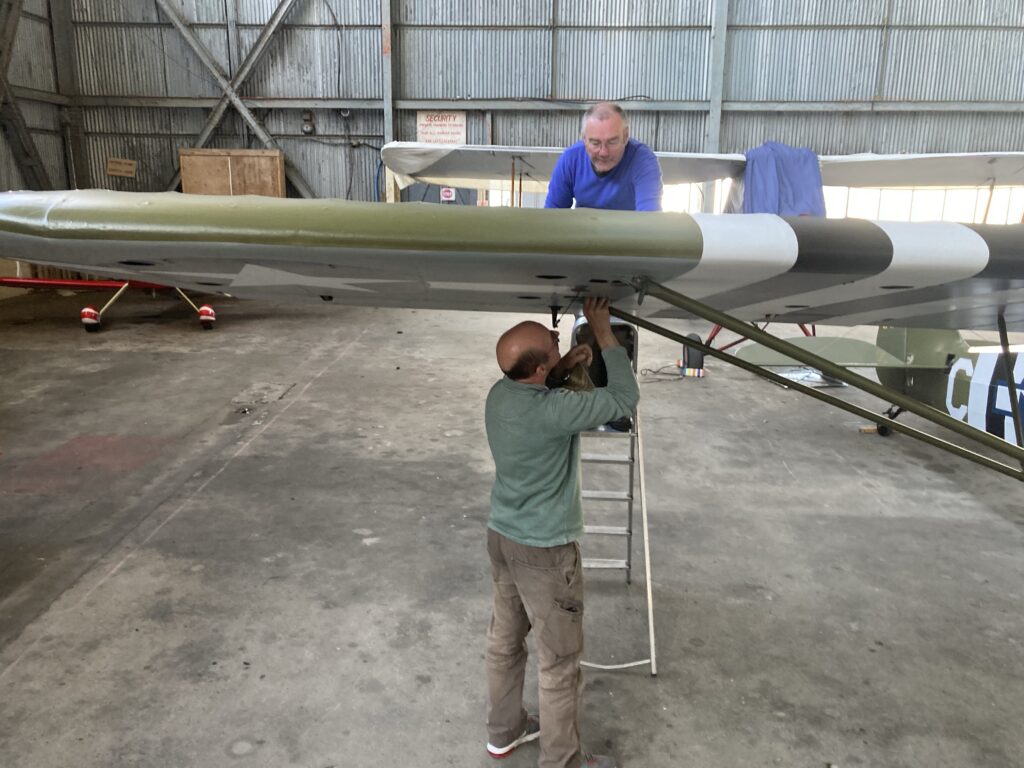
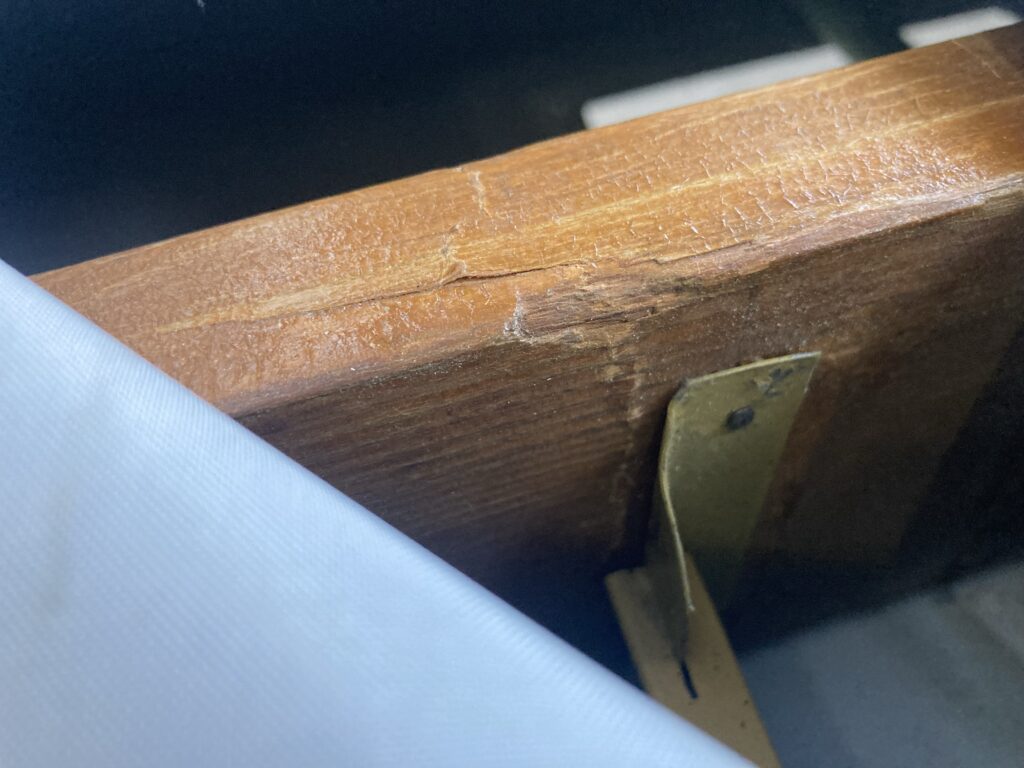
Aside from injuries, there’s always a chance of finding something concerning, and sadly on this occasion we did. Inspector Sandy (blue shirt) called in engineer and Cub expert Neil (green shirt) for a second opinion:
There was what could be a crack in the right rear wing spar. Visible from below, it might have just been a crack in the varnish…the top fabric was opened up to get a better look and this is what we found – a large crack. The wing is going to have to come off for repair. Depending on the depth of the crack it could mean a whole new spar.
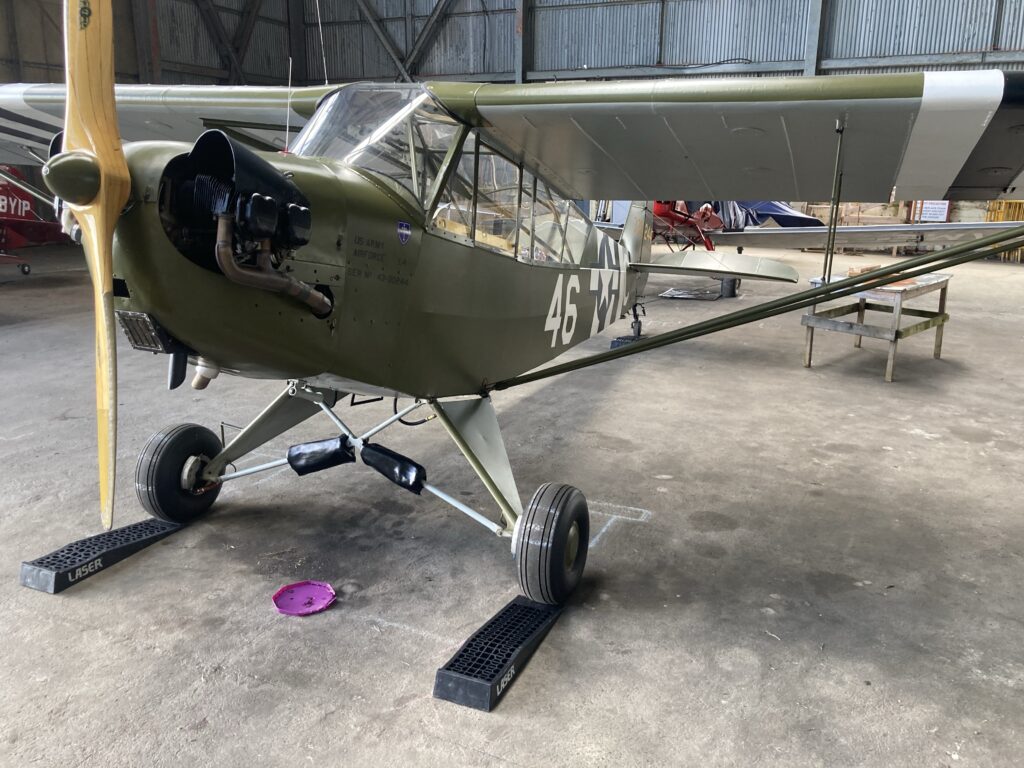
“Vintage Corner” in the hangar is starting to look like a repair shop…the joys of owning old aircraft:
Luckily I have the RV to fly while we’re waiting for repairs…
…and at least we found the crack in the hangar, rather than at 500ft over the D-Day beaches. That would NOT have made for good TV!
Every cloud etc
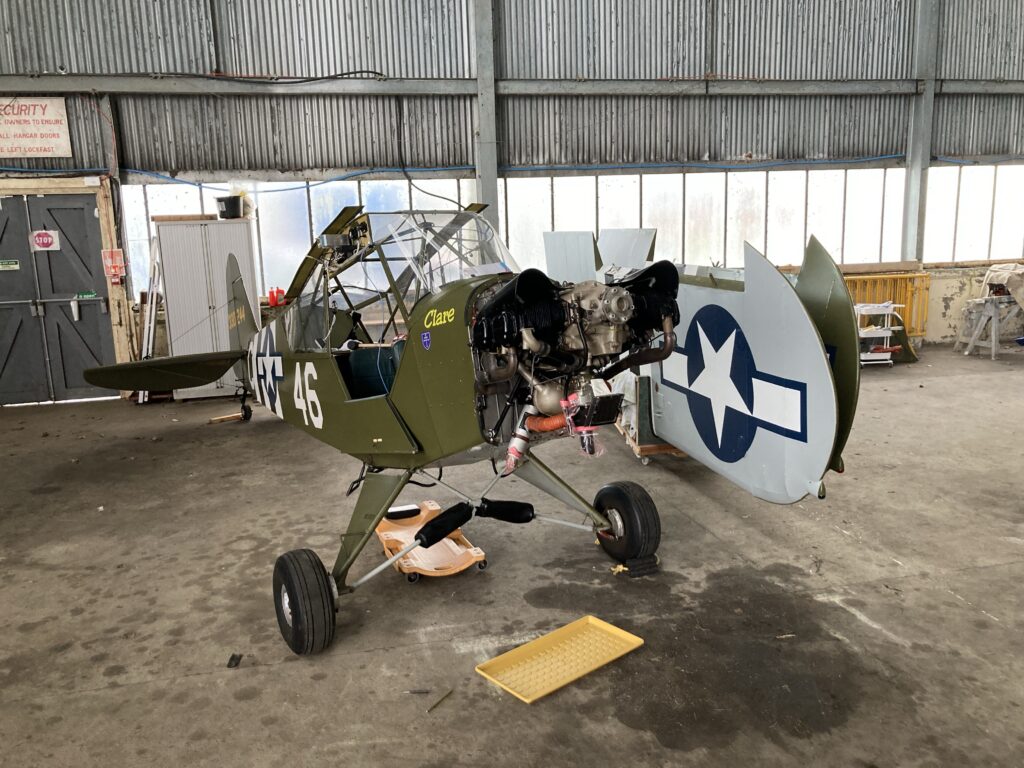
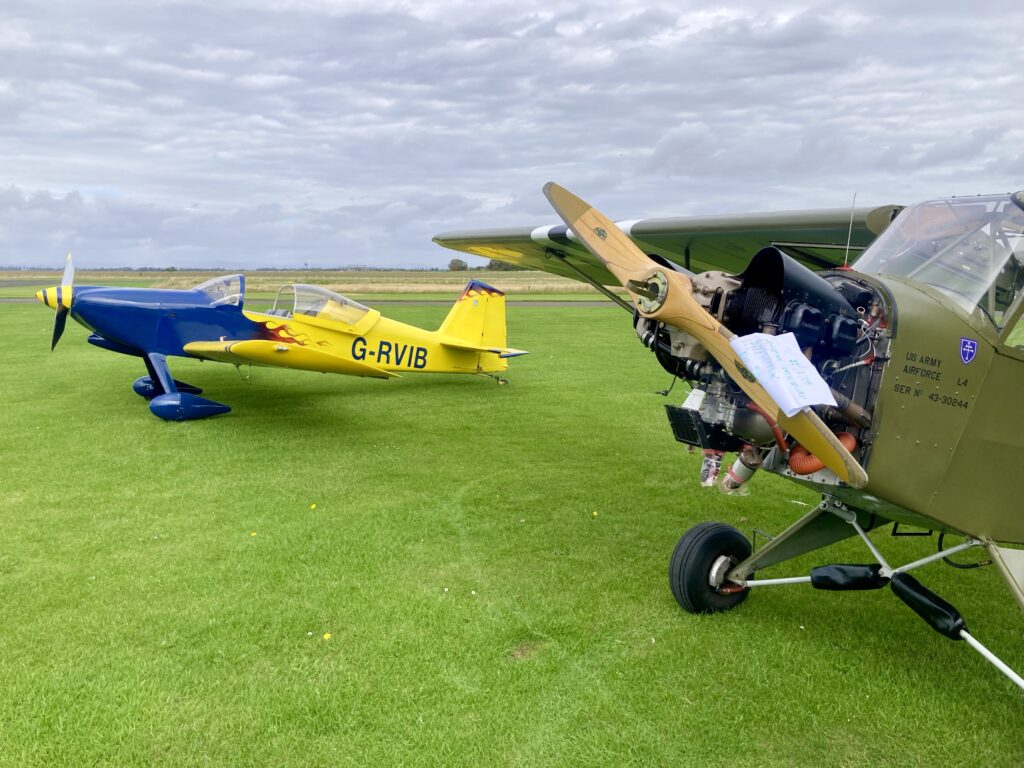
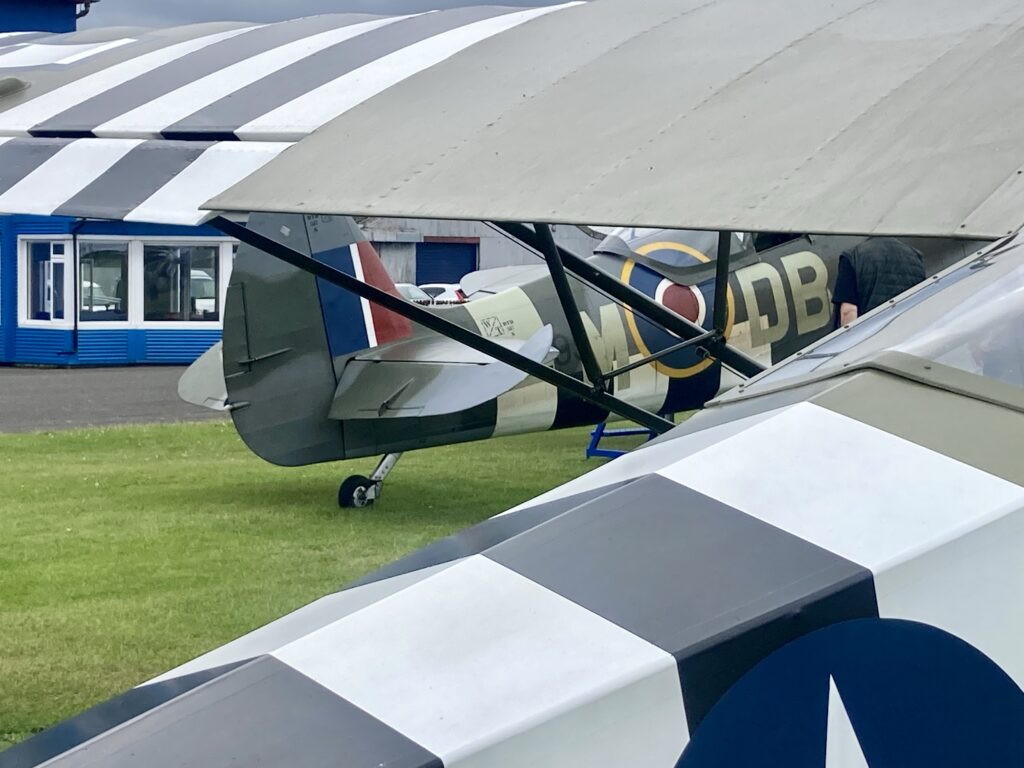
Early July and the warbirds are out at Perth…
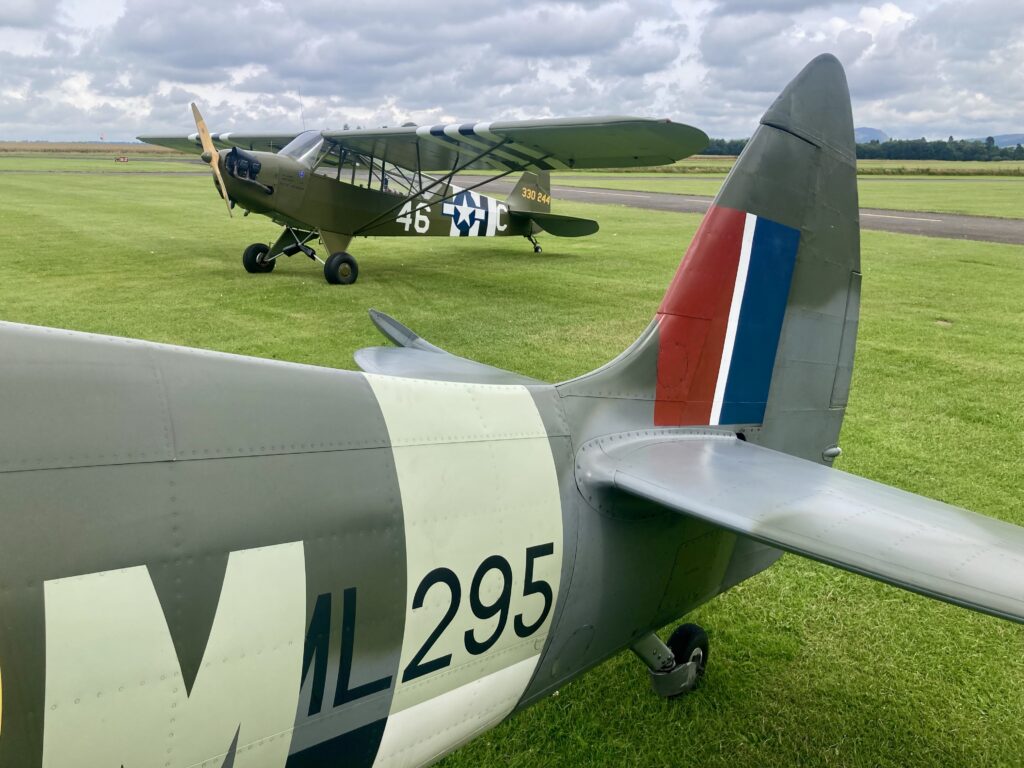
For a small fee you too can have a ride in a two-seat Spitfire Mk IX. Check them out at http://www.spitfires.com – we thought it would be a good idea to get some photos of the two warbirds together, so the Cub was wheeled out:
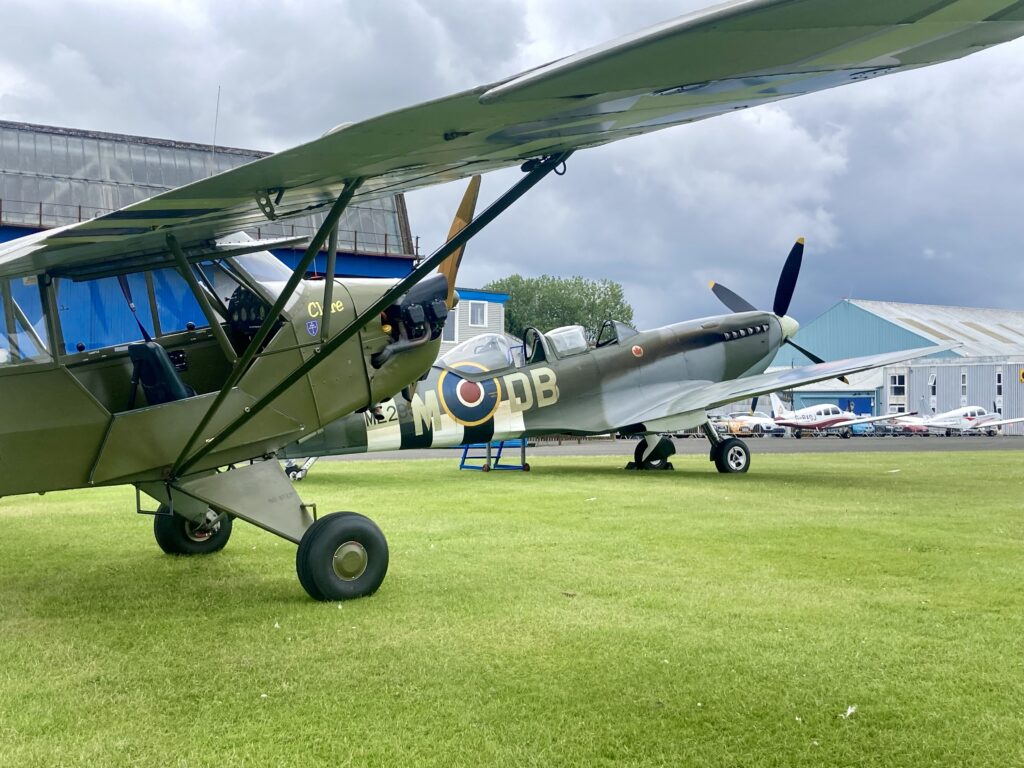
Both aircraft are single-engine taildraggers, with tandem seating for two. They have D-Day markings, and both have evidence of bullet holes. Virtually the same, but they wouldn’t let me take the Spitfire for a wee flight..!
Meanwhile back in the workshop at home, the SSDR Eindecker got a new ignition switch:
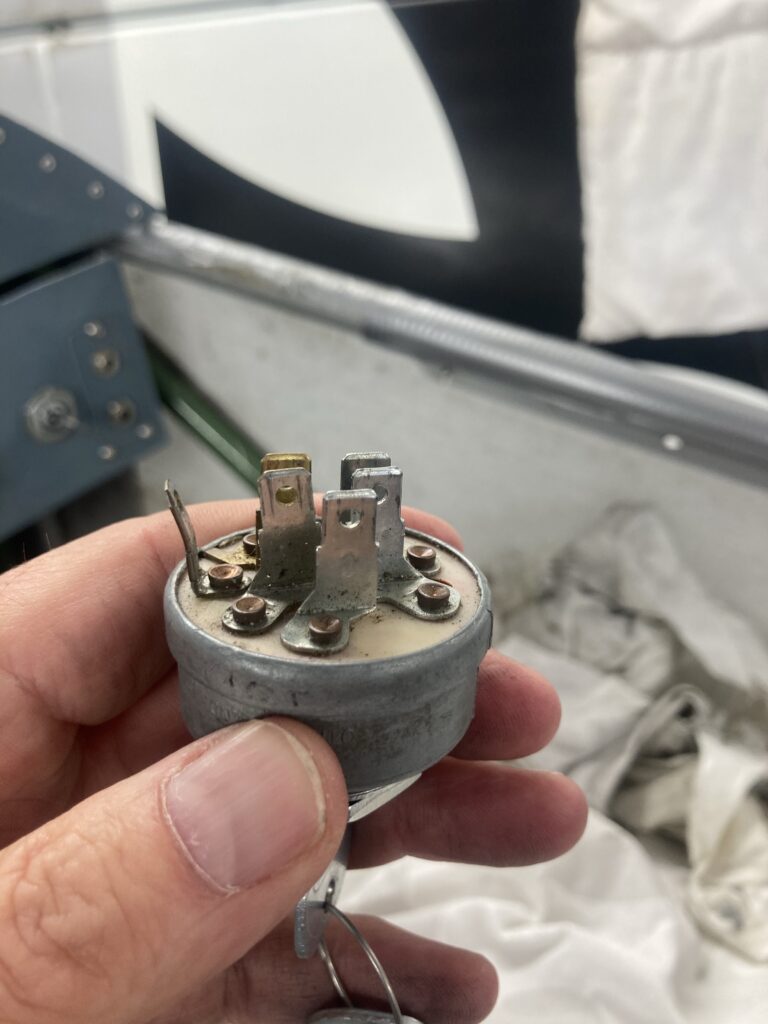
And silly me lost the wiring diagram and the photo of the old switch in situ so it took a morning of trial and error to get the leads on the correct terminals. Got there in the end…

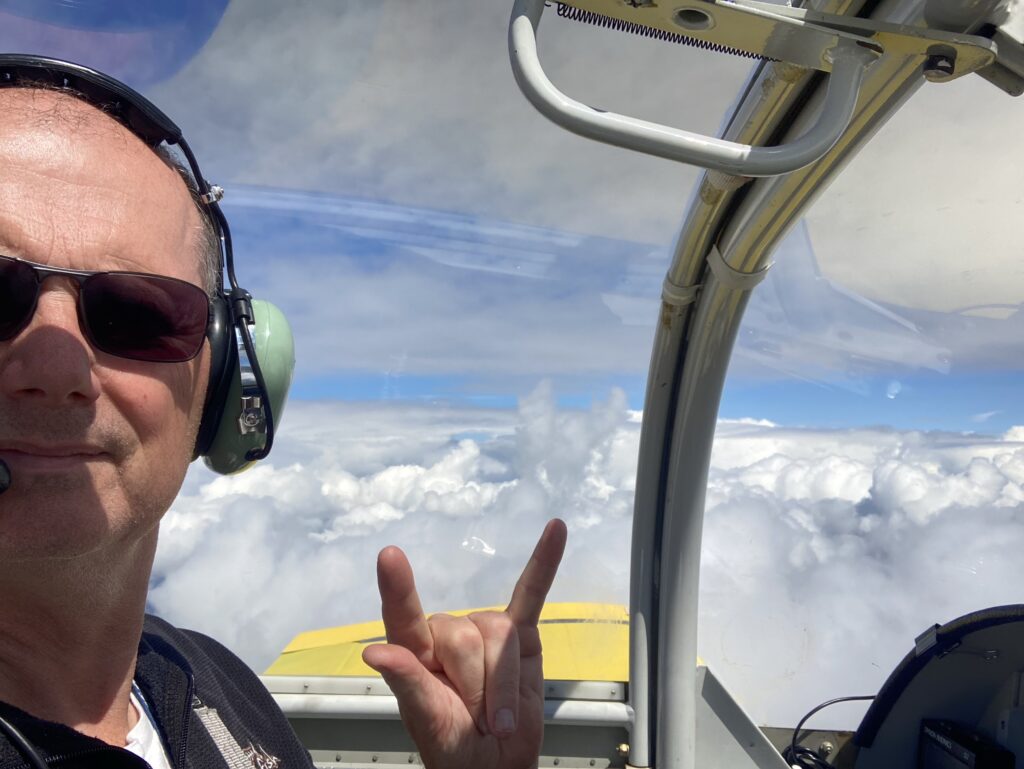
Quite a bit of RV flying thrown in, trying to find “hand gesture shaped” cloud formations, with limited success. Here’s the only one…
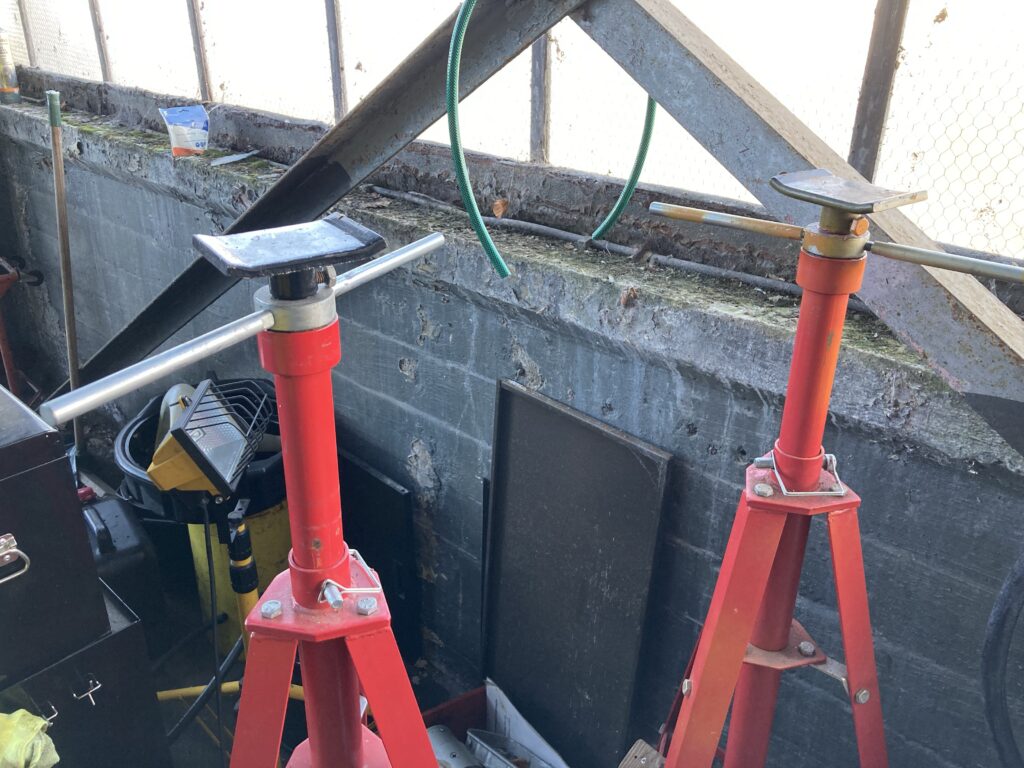
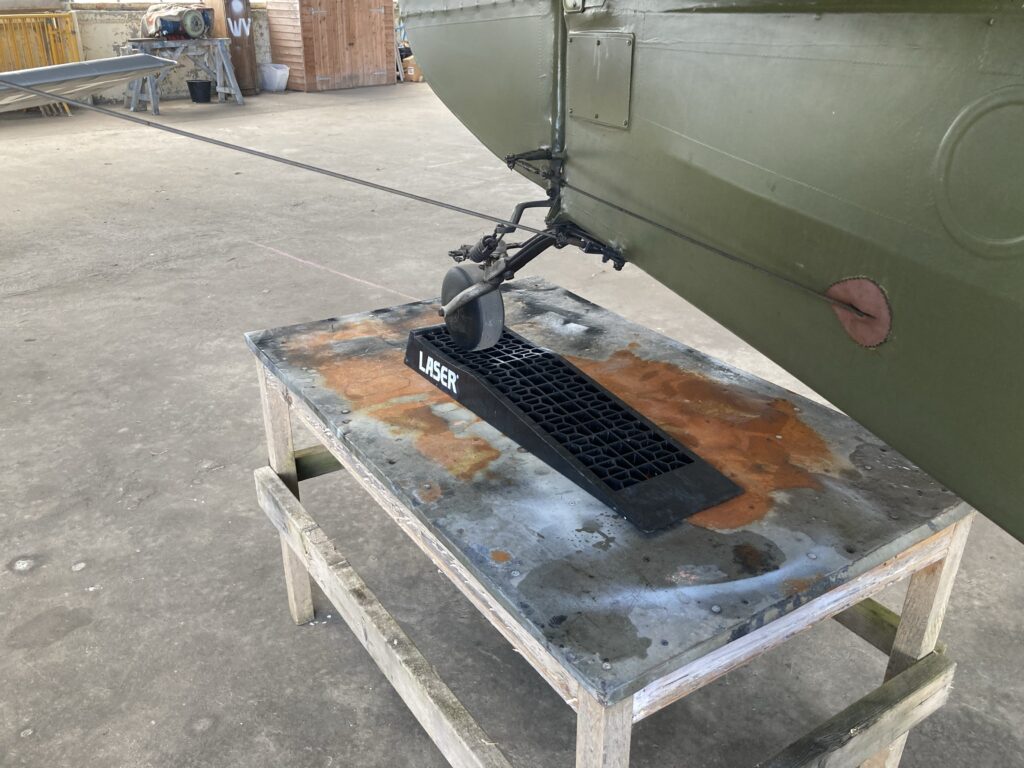
The Cub is now out of annual, as we are in the process of moving it from a CofA to a Permit to Fly. There are several stages, one of which is an aircraft reweigh. The aircraft is rolled up these ramps:
And then on to the special scales:
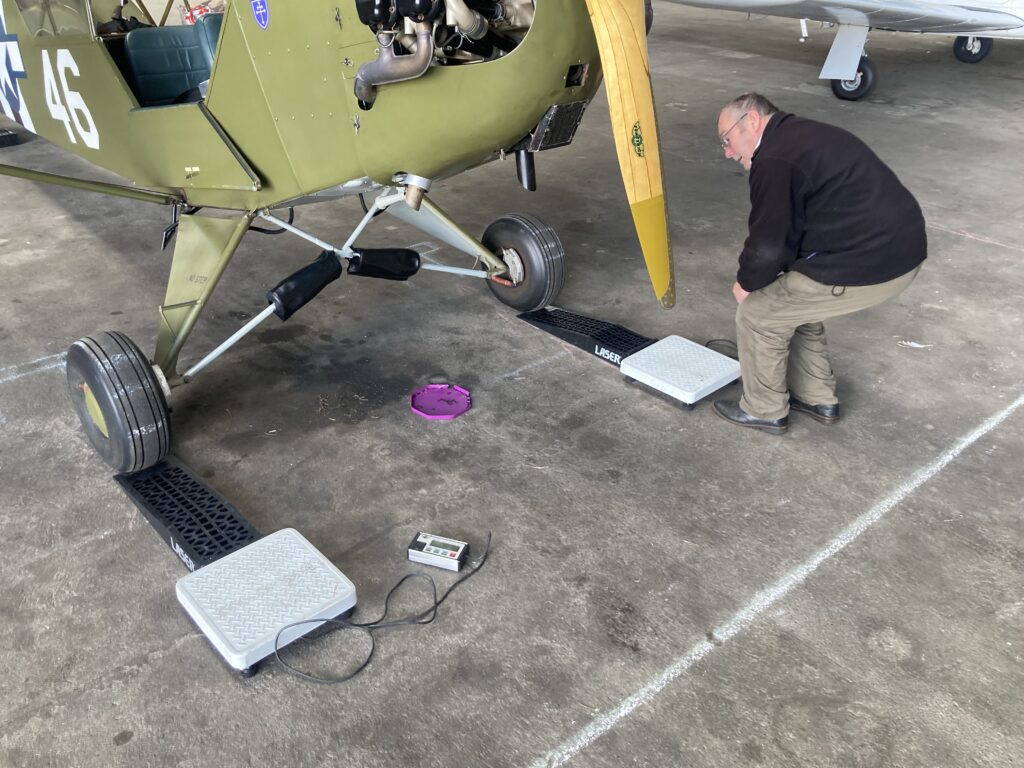
The tail is lifted until the fuselage is level (pic shows ramp but no scales yet) and then the weights are recorded for all three wheels.
After that there’s a bit of calculation magic to determine empty weight and CofG.
Next stage will be the aircraft inspection, plus there’s a bit of a paperwork sift to check that various service letters, service bulletins, airworthiness notices etc have been complied with.
A lot of the notices are from pre 1980, and should have been complied with when the aircraft was rebuilt in 2014, but we still have to check:
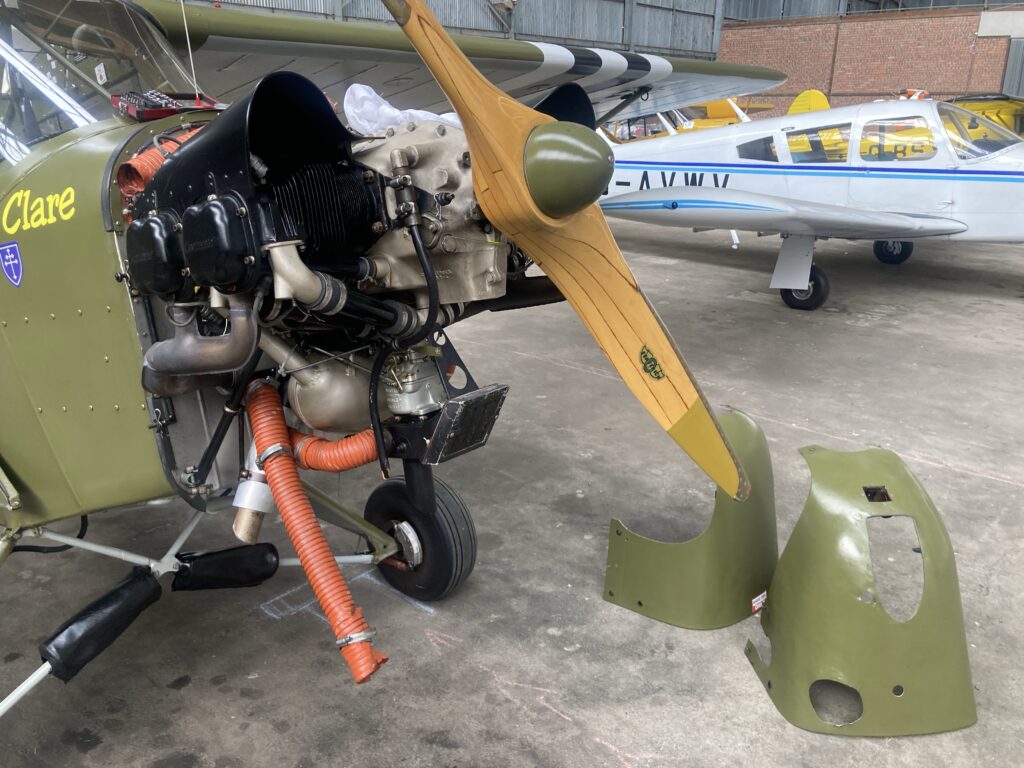
After this picture was taken and the cowlings were put back on, I got home to the paperwork and found that there may be another AD on the carburettor, depending on the model. So now I have to take them off again to check. Life is hard.
And finally a wee trip in the back of a BA A320 from Edinburgh to London for Uncle Johnny’s 80th birthday celebration- at a pub just visible in the photo on the south bank of the Thames in Greenwich.
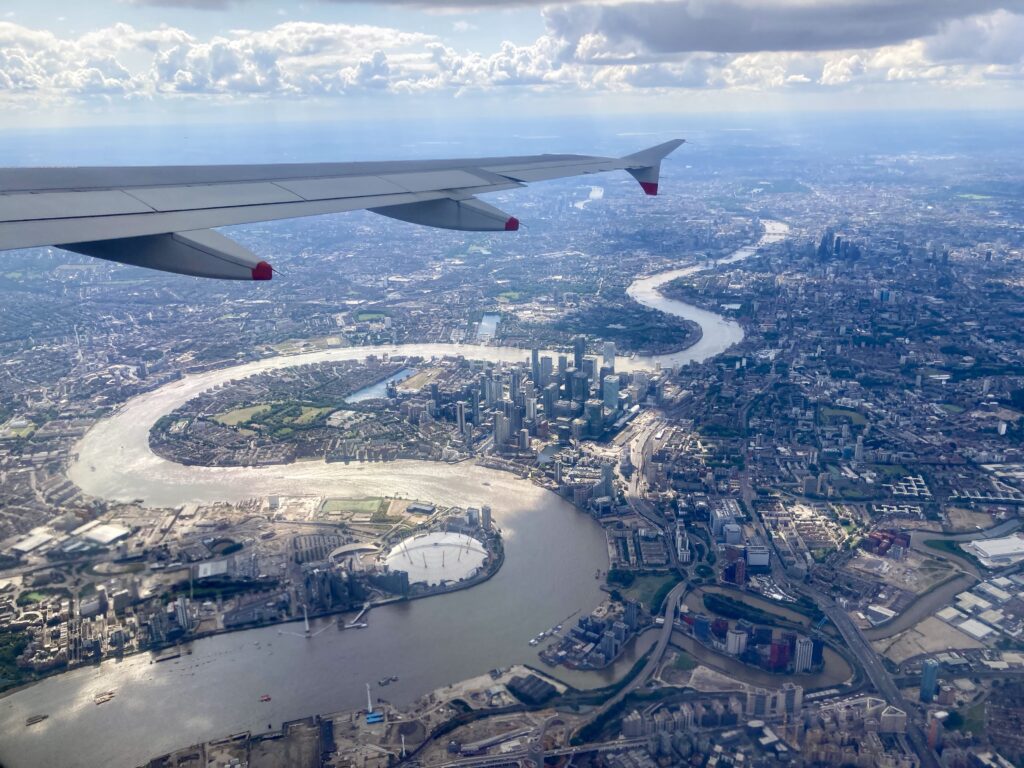
Whoever said retirement was full of free time was full of it themselves…